Building a professional recording studio for under $25,000
It’s the highest-end professional recording studio buildout in this series! This is a fully featured 16-channel professional recording setup with all of the bells and whistles. Be sure to check out my other home studio builds, for many other buildouts done at a variety of price points.
This particular build is a very serious level of gear, meant to be the backbone technical infrastructure for a recording studio business that aims to record bands of up to 5 people, performing live in the studio. If you’re going to spend this kind of money on recording gear, you’ll want to make sure you’ve also got a solid plan for convincing well-paying artist clients to work with you on a regular, repeating basis.
The Home Studio Gear Guide contains even more of my recommended gear for building out your home music studio.
Design assumptions
This build aims to provide the baseline gear for the recording and mixing of up to a 5 piece band that’s performing live in the studio. It’s optimized for a rock band popular music setup, but the microphones and preamps are of very high quality and could also work for recording acoustic instruments, or perhaps even a string quartet or other small classical or jazz ensemble.
For recording ensembles larger than 5 people, you’d be moving into the upper tiers of professional-level recording facilities, and possibly looking to upgrade to a larger format recording console/interface/outboard gear setup, rather than the computer based in-the-box recording setup I’m showing here. The mics, acoustics, and certain preamps shown in this more modest studio buildout would transfer over into such a larger setup nicely.
Be aware that building a studio to provide comprehensive recording services to ensembles that are bigger than your typical rock band is a massive undertaking, requiring significant floor space, monthly rent or building ownership costs, and additional tens to hundreds of thousands of dollars of gear, depending on the type of facility you’re trying to build.
The buildout shown here will get you started on developing a recording studio business, and can be expanded upon as your business grows.
Notes on acoustics
Regarding acoustics: refer to my acoustics notes from inside of my mixing-focused build: the acoustics selections noted here are for demonstration and educational purposes only.
Don’t just go out, buy these exact same items, and install them. Instead, make sure you perform an acoustics analysis yourself, or consult with a licensed acoustician, before determining the specific treatment you need inside of your individual space. Every individual room is different, and needs to be treated differently.
Our final budget
Here’s our gear list; we’re under budget by $290!
Audio Interfaces and Mic Preamps
Universal Audio Apollo x8p Gen 2: $3499
AEA TRP3 Two-channel Half-rack Microphone Preamp: $1299
Warm Audio WA273-EQ 2-channel Microphone Preamp & EQ: $1499
Warm Audio WA-412 4-channel Microphone Preamp: $1299
Monitoring
ADAM Audio T7V 7 inch Powered Studio Monitor Pair with T10S 10 inch Powered Studio Subwoofer: $765
Audio-Technica ATH-M30x Closed-back Monitoring Headphones x5: $345
Sennheiser HD 600 Headphones: $449
PreSonus HP60 6-channel Headphone Amplifier: $339
Roland RHC-25-1414 Headphone Extension Cable - 1/4-inch TRS Female to 1/4-inch TRS Male - 25 foot x5: $160
Microphones and DI Boxes
Coles 4038 Studio Ribbon Microphone, Stereo Matched Pair: $2963
Shure Beta 91A Boundary Kick Drum Microphone: $249
ElectroVoice RE320 Cardiod Dynamic Microphone: $295
Sennheiser MD 421 Kompakt Dynamic Microphone x3: $897
Shure SM57 Dynamic Instrument Microphone x2: $198
Lauten Audio Snare Mic FET Condensor Microphone: $398
Electrovoice RE 20 Broadcast Dynamic Microphone: $449
Sennheiser e906 x2: $399
Primary vocal mic budget option: Audio Technica AT 2020: $99
Primary vocal mic premium option: Gefell M92.1 S Cardioid Tube Condenser Microphone: $2990
Radial ProAV1 1-channel Passive A/V Direct Box: $149
Radial ProD2 2-channel Passive Instrument Direct Box: $199
Sennheiser e835: $91
Cabling
Pro Co EVLMCN-25 Evolution Microphone Cable - 25 foot x18: $898
Mogami Gold TRSXLRM-15 Balanced 1/4-inch TRS Male to XLR Male Patch Cable - 15 foot x2: $160
Mogami Gold DB25-XLRF 8-channel Analog Interface Cable - 5': $269
Mogami Gold DB25-XLRM 8-channel Analog Interface Cable - 5': $249
Stands and clips
Behringer SM5002 Heavy-Duty Height-Adjustable Monitor Stand Set: $69
Ultimate Support MC-125 Studio Series Microphone Boom Stand x2: $598
Lauten Audio Rim mount: $99
K&M 25950 Extra Low Profile Tripod Base Boom Mic Stand x5: $510
K&M 210/9 Telescoping Boom Microphone Stand x5: $510
Outboard racks
Gator G-PRO-8U-19 Pro Series Rack Case: $269
Acoustics
Acoustic treatment: first reflection points: $315
Acoustic treatment: corner bass traps: $1100
Acoustic treatment: speaker pads: $284
Acoustic treatment: estimated shipping costs: $350
Total: $24,710
Audio Interfaces
Universal Audio Apollo x8p Gen 2 ($3499)
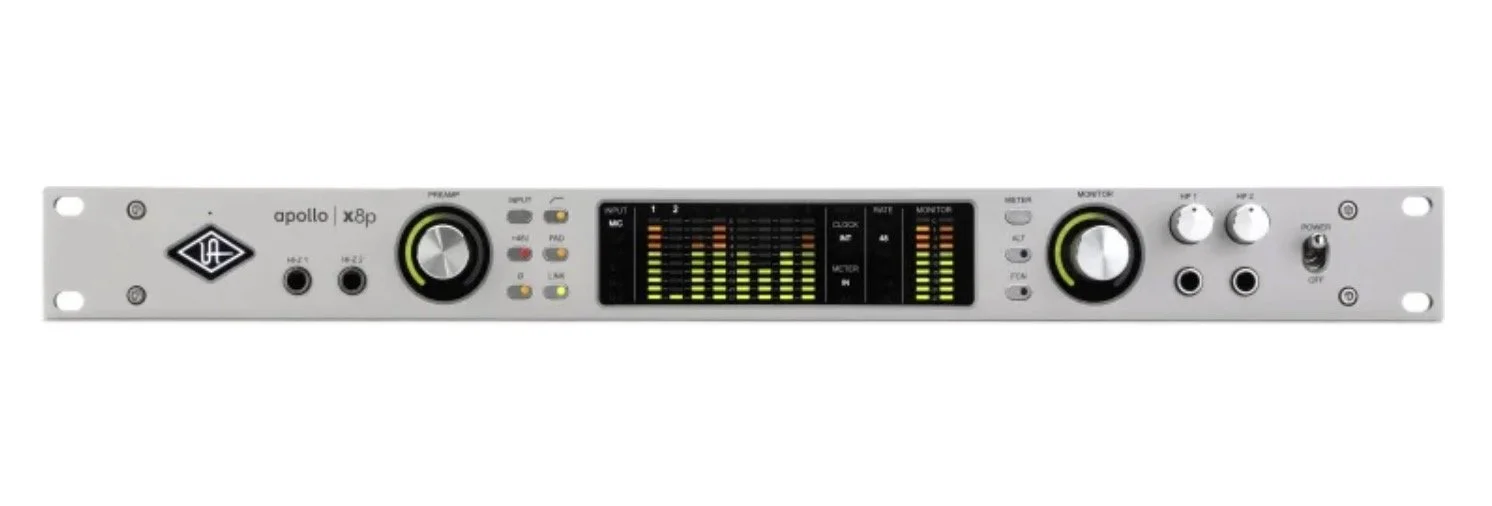
Universal Audio Apollo x8p Gen 2 audio interface.
16 recording channels would be the minimum I’d recommend for anyone attempting to open a full-service recording and mixing studio that records entire bands performing live in the studio. This interface provides those 16 channels, at a strong level of quality.
This is a Thunderbolt/USB-C interface, which should have good future-proofing, and allow for many years of recording before an upgrade would be necessary. Make sure you check compatibility with your computer system before purchase.
Universal Audio makes some solid gear, however if you have the budget I’d also recommend considering the Lynx family of audio interfaces. They’re more expensive, but they’re my preferred choice, what I use myself, and I’ve found the increased sonic quality more than justifies the increased cost.
Remember, every signal you record is going to pass through your interface, so this is an area where it might make sense to focus more on quality over price.
Mic preamps
AEA TRP3 Two-channel Half-rack Microphone Preamp ($1299)
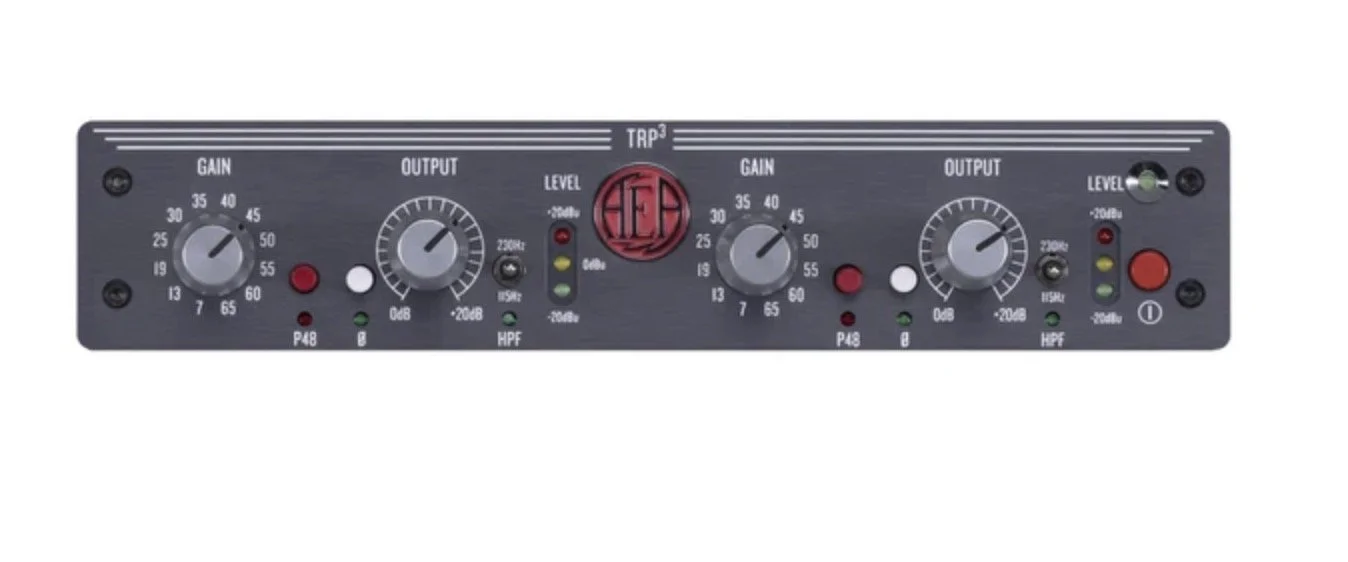
AEA TRP3 Two-channel ribbon microphone preamp.
The Universal Audio interface already includes 8 mic preamps built into it, so why am I spending money on purchasing additional outboard preamps? Two reasons:
It’s very helpful to have more than 8 recording channels to work with when recording full bands. 16 is the minimum I’d recommend in that situation, so we’ll need to fill out the additional 8 recording channels available on our interface with some outboard microphone preamps.
These particular preamps are specially designed for the Coles ribbon mics I’m recommending. They have a ton of gain (ribbons are generally low-output mics), and are super high impedance, both specs that will let us get lovely, natural sounds while using our ribbon mics. When we’re spending the big bucks on top-of-the-line ribbon microphones, using dedicated ribbon preamps can really help these particular mics sound their best. Hint: these specialty preamps will also make your dynamic mics sound amazing!
Warm Audio WA273-EQ 2-channel Microphone Preamp & EQ ($1499)

Warm Audio WA273-EQ 2-channel Microphone Preamp & EQ.
Warm Audio has been successful in providing a level of quality that’s certainly professional enough to get started with, while also keeping their prices much more reasonable than the name brands in pro audio like Neve and API. They’re a good balance of price and performance, and that value is why I’ve chosen them for this build.
This particular 2-channel preamp was chosen for its flexibility; it’s both a mic preamp and a hardware EQ, with convenient instrument and mic inputs built right into the front panel.
I’m imagining these being some of your most-used preamps day to day; their layout makes it very convenient to quickly plug a mic or an instrument in and EQ a good basic sound with just the turn of a few knobs, so they’re perfect for quick overdub sessions with vocalists or instrumentalists. They’d also work great as the front end for a two microphone podcast interview setup.
Warm Audio WA-412 4-channel Microphone Preamp ($1299)
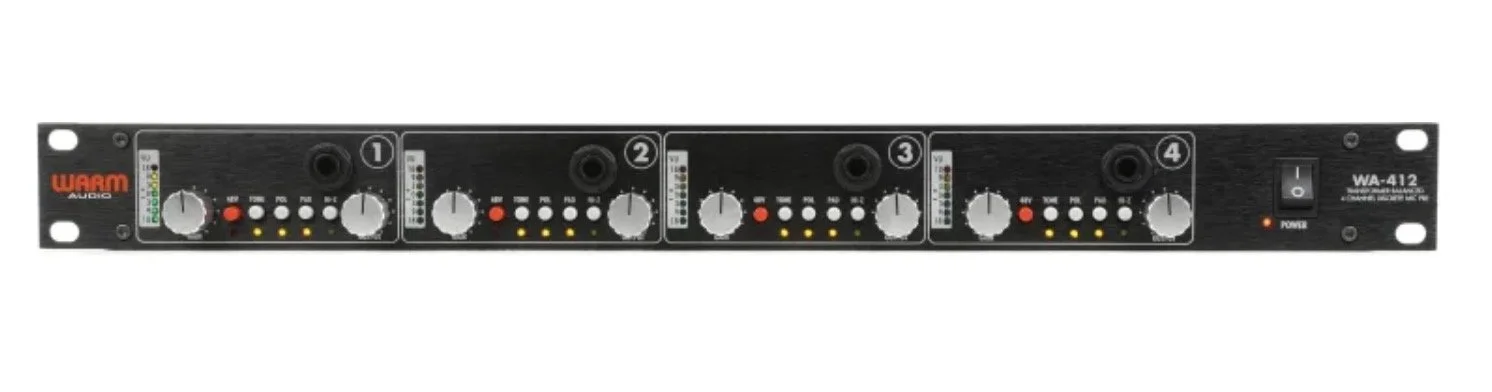
Warm Audio WA-412 4-channel Microphone Preamp.
Another great basic set of general-purpose, professional quality mic preamps at a reasonable price. You get four of them in a single compact 1U chassis, with the usual complement of pro quality features you’d expect: each channel gets dedicated phantom power, a polarity switch, a built-in pad, and a tone button for adding some extra transformer thickness.
I especially like the dedicated input and output transformer gain knobs present on this unit: this lets you tweak the ratio of input to output transformer individually for each channel, for a more colored or more transparent sound. That feature in particular gives these preamps a lot of sonic versatility in the studio.
Monitoring
ADAM Audio T7V 7 inch Powered Studio Monitor Pair with T10S 10 inch Powered Studio Subwoofer ($765)

ADAM T7V studio monitor and subwoofer bundle.
The ADAM Audio TV7s are a strong entry point into professional studio monitoring, particularly when paired with a subwoofer. This is a very attractive bundle at a very reasonable price, given the quality of this brand.
If you have a more money to spend, you might consider the Genelec series of monitors; they’re significantly more expensive (several thousand dollars for monitors and subwoofer combos), but they’re what I personally use, and I’ve found the quality does justify the increased cost.
Starting off with something pro quality yet a little cheaper like the ADAMs, and then adding a secondary monitor setup as your studio develops and starts to generate income, is a common move done by many studio pros when they’re first building out their studios.
As with all subwoofer monitoring setups, the placement and calibration of your subwoofer is critical! A poorly placed subwoofer can cause more sonic issues that it solves when it comes to mixing, so do your research and be sure you’re comfortable properly positioning and calibrating this gear inside of your control room, before committing to a subwoofer based monitoring setup.
Headphones
Audio-Technica ATH-M30x Closed-back Monitoring Headphones x5 ($345)
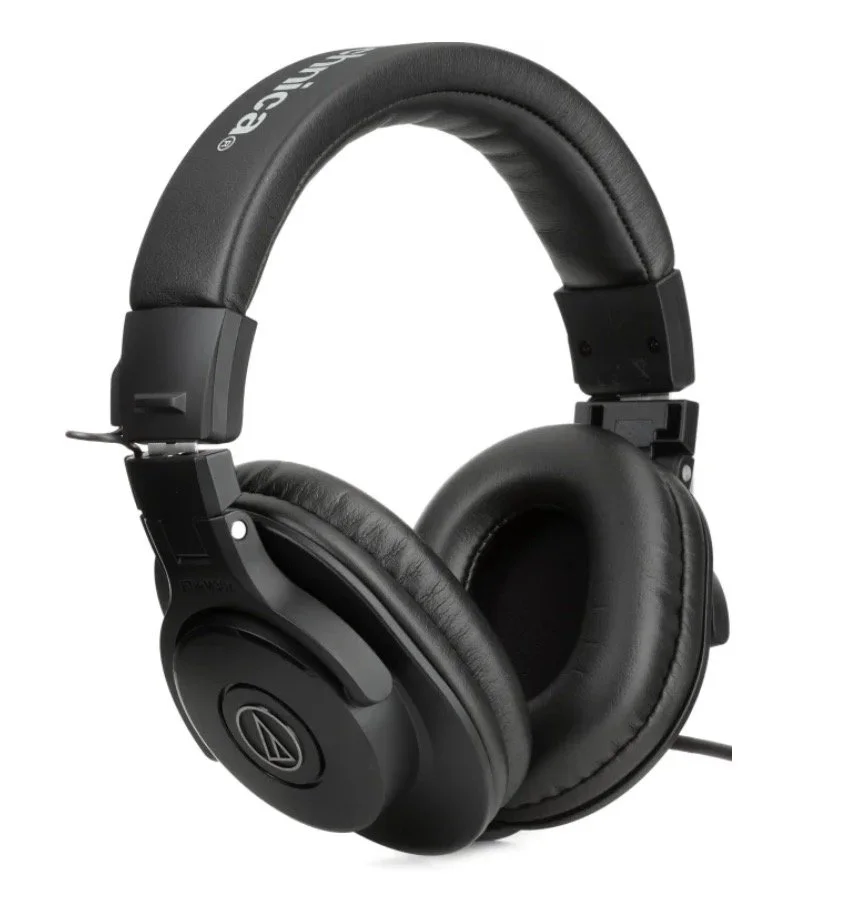
Audio-Technica ATH-M30x Closed-back Monitoring Headphones.
There’s 5 pairs of the budget-priced but capable ATH-M30x studio monitoring headphones included, one for each member of the band to wear during recording. You don't need to spend crazy money on basic monitoring headphones: they’re disposable items in the studio that will need to be replaced regularly as they wear down over time, and we’re only looking for a sound that’s good enough for our musicians to clearly hear themselves while performing. A super high-grade mixing headphone would be overkill for simple monitoring duties during live performance.
Sennheiser HD 600 headphones ($449)
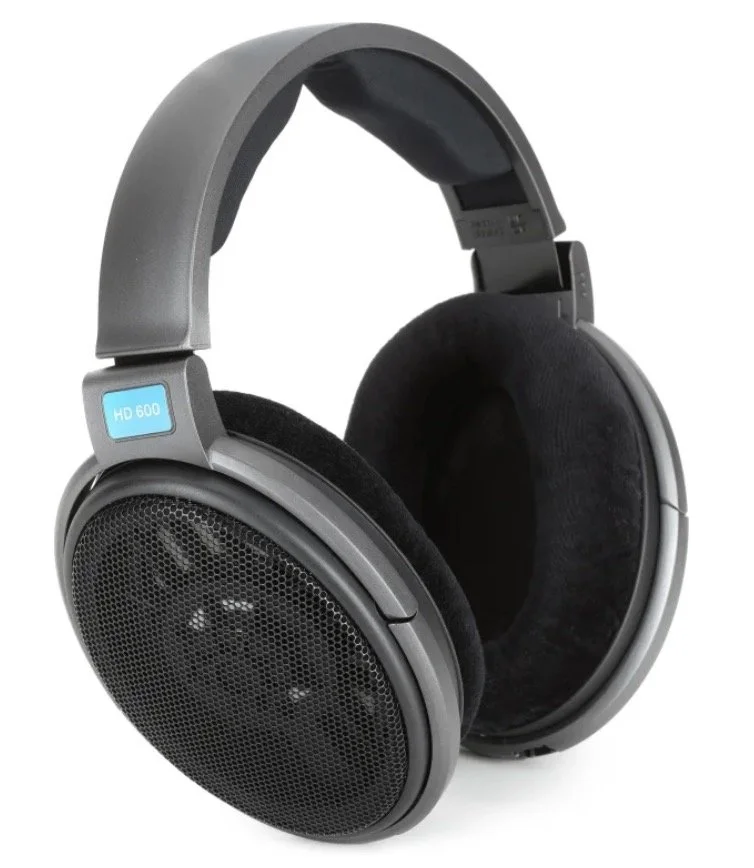
Sennheiser HD 600 headphones.
We do need at least one pair of high-end headphones. These are the nice ones, you’ll be wearing these during recording for more detailed monitoring, and they’re also useful during mixing as a high quality headphone reference. I love these headphones; they have great detail, transparency, and accuracy. You’ll want to avoid using them for monitoring during recording when located close to a microphone; their semi-closed back design means sound leaks from outside of the headphone body, and you don’t want a mic picking up your headphone bleed during a performance.
Headphone distribution
PreSonus HP60 6-channel Headphone Amplifier ($339)
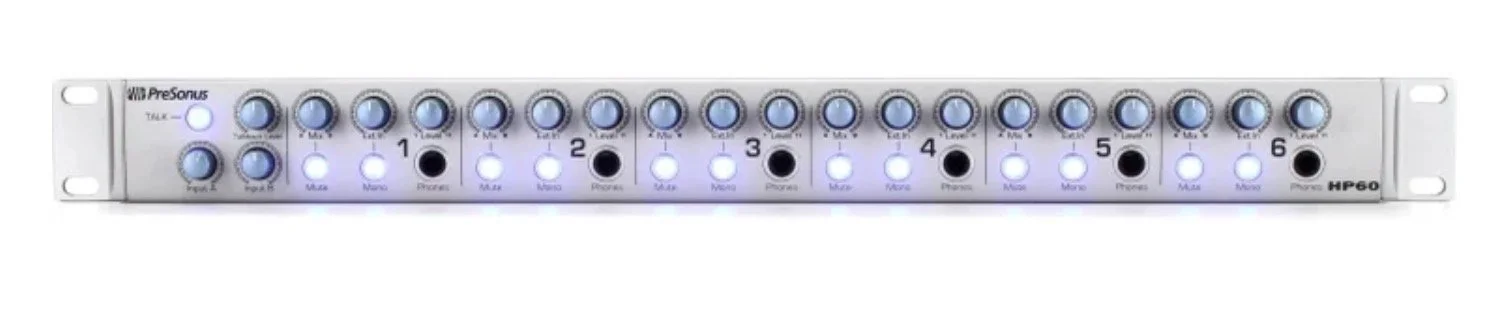
PreSonus HP60 6-channel Headphone Amplifier.
Headphone monitoring distribution inside the recording studio can get complicated and expensive very quickly. The ideal monitoring setup uses a series of personal monitoring stations; each musician gets their own personal mixer where they can plug their headphones in, and then adjust their own individual monitor mix to hear exactly what they want to hear while they’re performing.
You’ll want to consider upgrading to a personal monitoring setup ASAP, as this will forever stop any complaints from the drummer that the bass isn’t loud enough in their headphones. It’ll also free you up as the engineer to focus on capturing the performances, rather than on constantly adjusting monitor mix requests from the band. Once your recording studio business is up and running and profitable, I’d make a personal monitoring setup one of your very first upgrades: musicians love working with them, they’re great for engineers, and they’re a super convenient and no-brainer win-win all around.
While personal monitors are rapidly dropping in price, they’re still quite expensive, sometimes ranging into the thousands of dollars between the distribution station, cabling, and individual monitoring mixers you need to purchase.
This PreSonus headphone amplifier is a simpler headphone distribution setup that’s meant to be good enough to get started with, while you’re first getting your studio business up and running. It’s got a talkback mic input and a push-to-talk button built right in, so there’s no need to set up a talkback feed inside of your DAW software, just to chat with the band during the session.
You also get two different mix inputs, with the ability to blend between both mix A and mix B on each individual headphone channel. So, maybe you set up one vocal forward monitoring mix as Mix A and another rhythm section forward monitoring mix as Mix B, then adjust the blend of the two for each musician individually, depending on what they want to hear during recording.
Microphones
Coles 4038 Studio Ribbon Microphone, Stereo Matched Pair ($2963)

Coles 4038 ribbon microphones.
These matched pair Coles 4038 ribbon mics are expensive, but that’s for a reason: these are some of the best-sounding ribbon mics you can buy. This matched pair is set up for use as drum overheads, where they can really shine, but these mics also sound great on a wide variety of sources. Try them on acoustic instruments (particularly bowed strings, piano, and acoustic guitar), woodwinds, or even vocals. As with all ribbon microphones, be careful of moving air in close proximity to the delicate ribbon; make sure this mic is set up at least 6-12 inches from the vocalist’s mouth, and use a pop filter. You also don’t want to get super close in with this mic when working with very loud instruments.
Shure Beta 91A Boundary Kick Drum Microphone ($249)
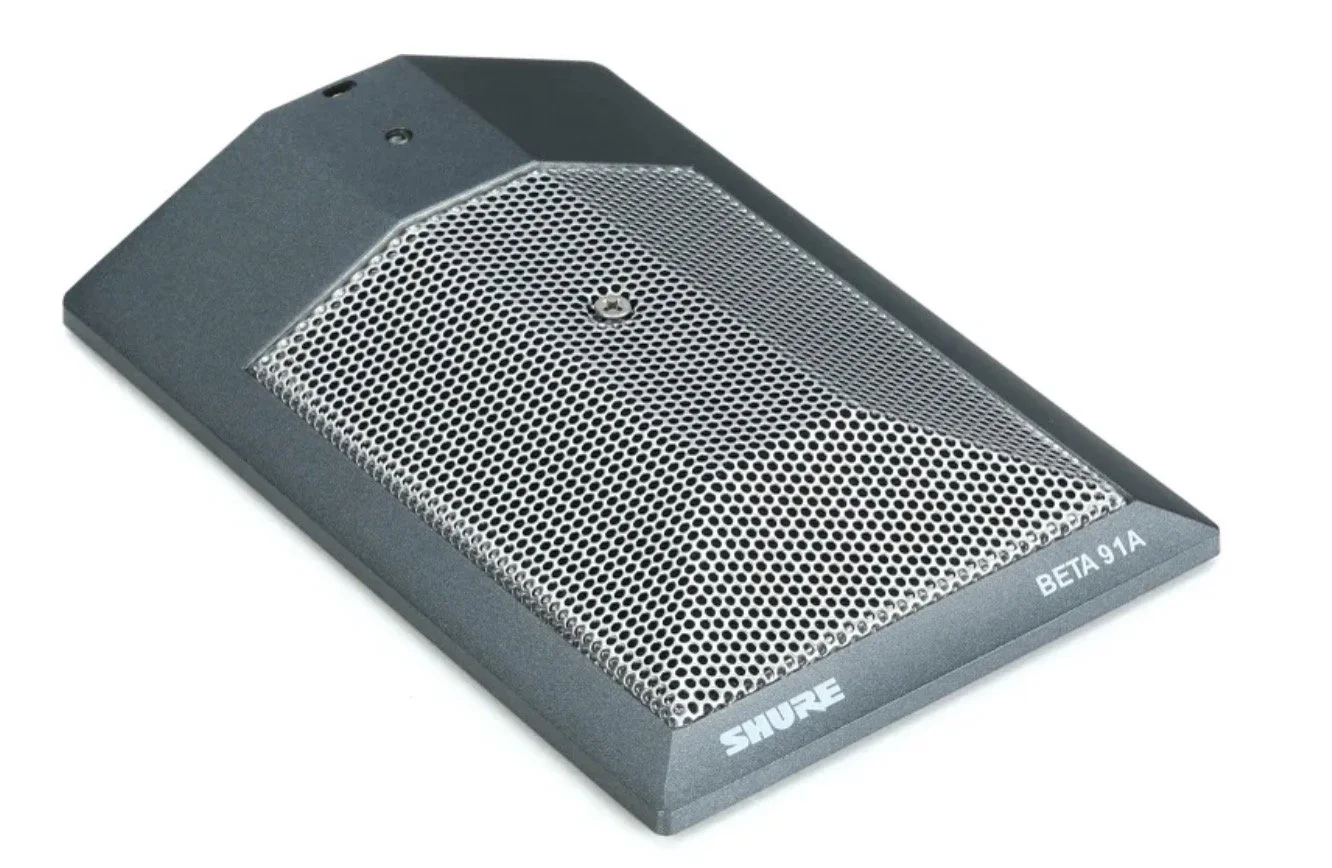
Shure Beta 91A Boundary Kick Drum Microphone.
This is a specialty microphone designed to capture the lowest sub frequencies, especially when used with a kick drum. This mic is often placed inside of the kick drum body to capture the batter head of the kick, and can be a useful tool in getting some extra thickness and punch into your kick drum sound.
Electro-Voice RE320 Cardioid Dynamic Broadcast Microphone ($295)

ElectroVoice RE320 Cardiod Dynamic Microphone.
This is a variant of the studio classic Electro-Voice RE-20 dynamic mic, optimized for low-frequency capture. It would work great used on the resonant head of the kick drum, and could double for recording bass and guitar cabs, or even vocals.
The EV RE20 and this EV RE320, when combined with the Warm Audio 2-channel preamps listed above, would make for a very nice two-person podcast interview studio setup! That’s an additional potential income stream for your business.
Sennheiser MD 421 Kompakt Dynamic Microphone x3 ($897)
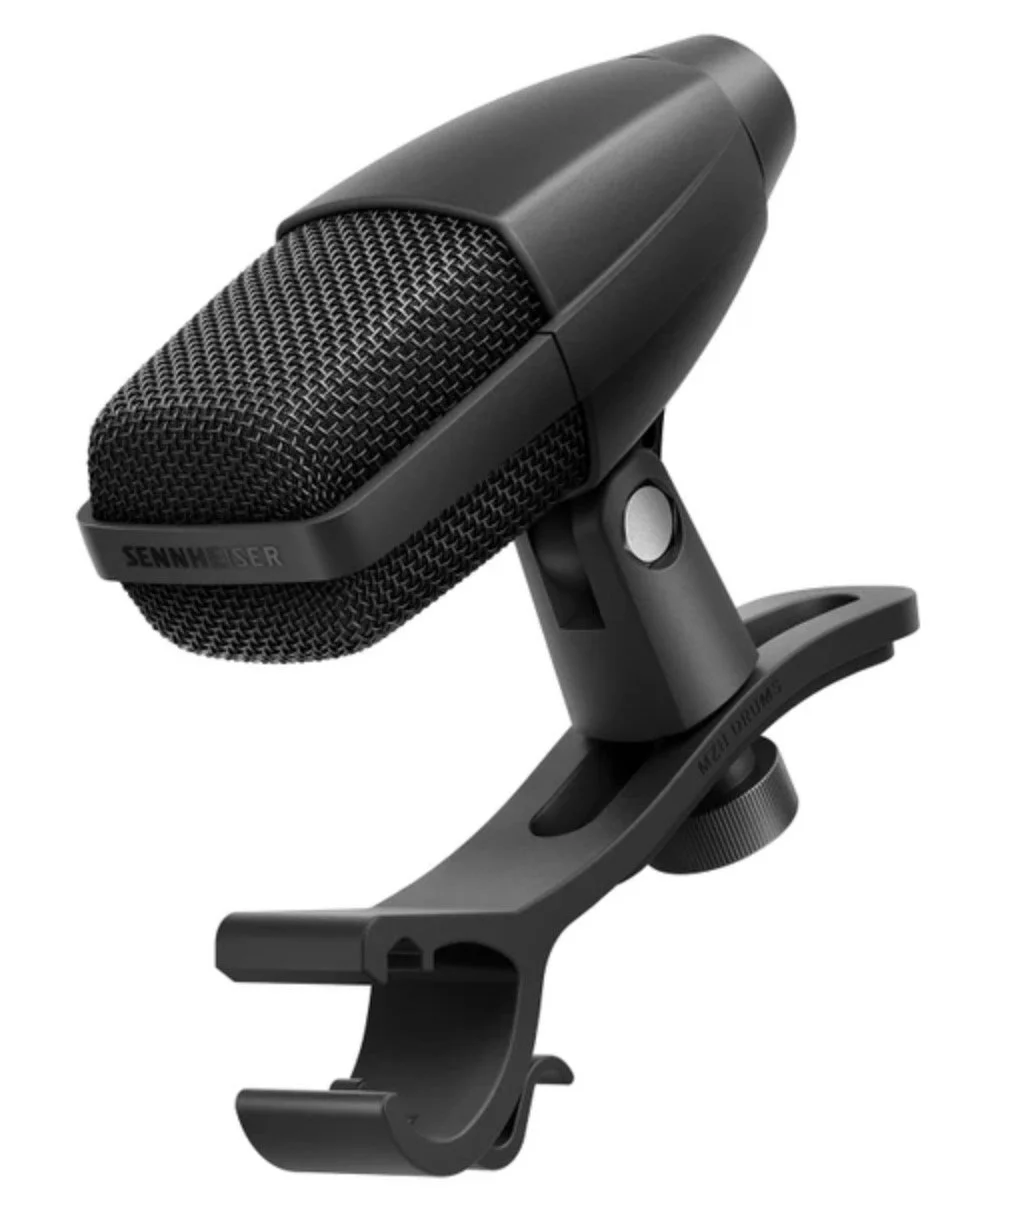
Sennheiser MD 421 Kompakt Dynamic Microphone.
These are your everyday drum kit microphones. The regular-sized Sennheiser MD 421 is a pro studio classic when used on tom-toms. This “Kompakt” version is a slightly smaller variant of the same mic, optimized for use on drums, with an improved clip for direct mounting to the drum rim. I’ve included three of these mics, one for each tom-tom (two rack toms and one floor tom). This gets you all of the great sound of the full-sized MD 421, in a drum-optimized package that’s way easier to set up and use day-to-day.
Because these mics include integrated drum clips and mount directly to the drums, we can also save a little money by not needing to purchase additional mic stands for this application.
If you have more money to spend and are looking for the very best in drum tom-tom capture, considering upgrading one of these three mics to the Sennheiser MD 441 U. It’s significantly more expensive and didn’t fit into this budget, but it’s the gold standard when it comes to capturing studio-quality floor toms. Double-micing the floor tom (micing both the batter and resonant heads) can also be an interesting option to experiment with.
Electro-Voice RE20 Broadcast Dynamic Microphone ($449)
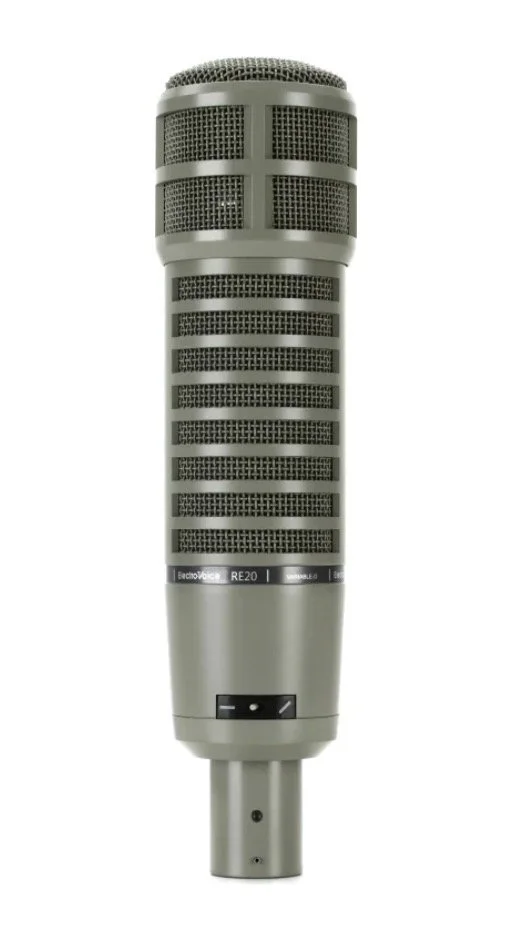
Electro-Voice RE20 Broadcast Dynamic Microphone.
Another pro studio classic, this mic works great on many things: instruments, kick drum, bass and guitar cabs, and vocals (especially rap styled vocals or podcasting). In this particular build, you might find yourself using it on guitar and bass cabs most often, but this is a great general-purpose mic you can find a lot of uses for.
Shure SM57 Dynamic Instrument Microphone x2 ($198)
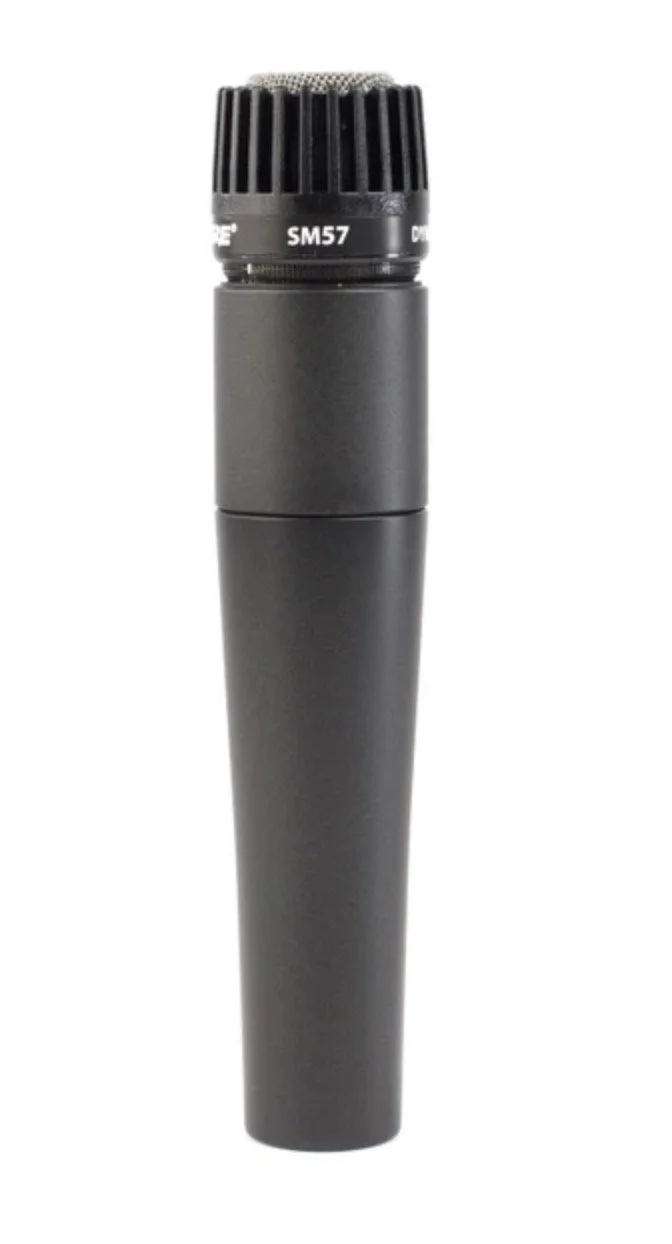
Shure SM57 Dynamic Instrument Microphone.
I’m including this budget yet classic microphone option as a snare drum mic (for either the top or bottom head). Using an SM57 on snare is one of the best uses for this particular microphone; even though it’s a cheaper mic, it’s got a very classic sound when it comes to the snare drum. There’s two of these included; it’s always handy to have multiple SM57s around.
Lauten Audio Snare Mic FET Condensor Microphone ($398)
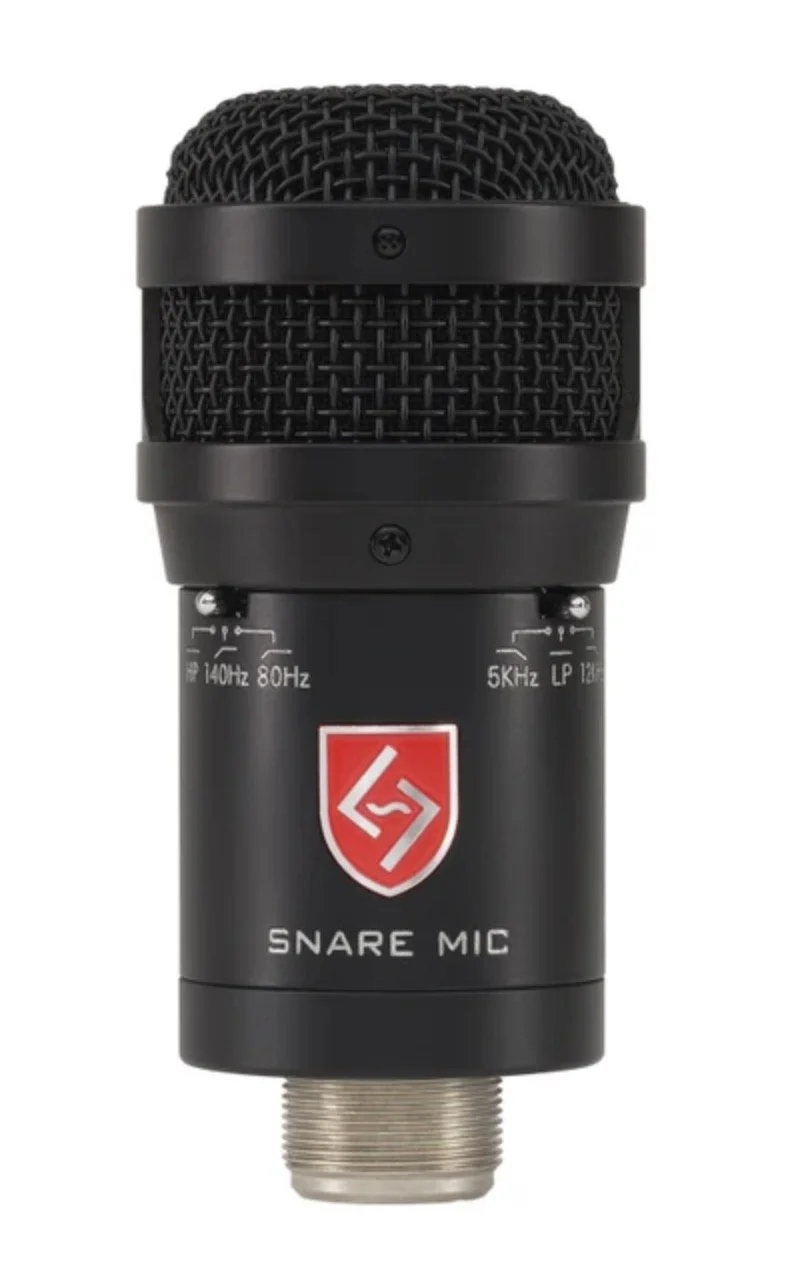
Lauten Audio Snare Mic FET Condensor Microphone.
A bit of an unusual choice, this is a condenser microphone that’s been specifically designed to capture snare drum. It’s got a tone of tone-shaping options built into the mic for this purpose. I really like its ability to capture the thicker body tone of the snare drum, and in that way this mic is complementary to the SM57’s brighter sound. These two mics, when used in combination on the top and bottom snare heads, would allow a lot of flexibility in capturing various types of snare tones. Try using the Lauten Audio mic on the top head and the SM57 on the bottom head, for a nice thick snare sound that still retains brightness.
Budget vocal mic option: Audio Technica AT 2020 ($99)
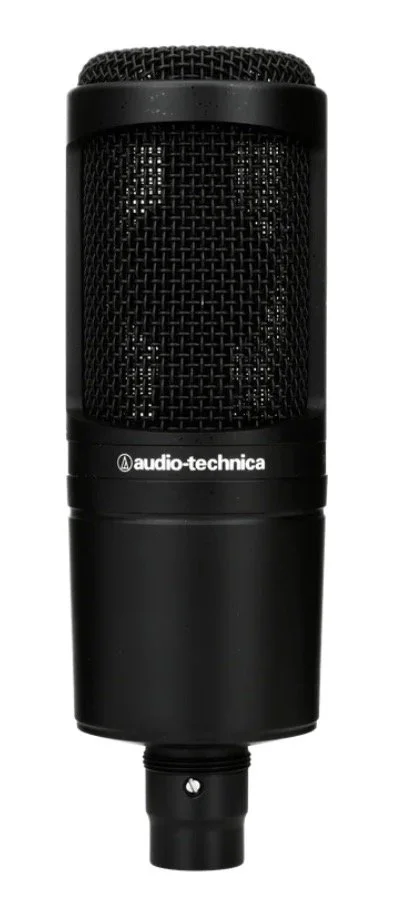
Audio Technica AT 2020 Condenser Microphone.
Though an extremely affordable mic, this is a versatile condenser that has stood up as a strong contender in vocal mic shootouts next to microphones ten times its price! It’s a good general purpose condenser to have on hand, and is a solid place to get started when building your skills with vocal micing.
Premium vocal mic option: Gefell M 92.1 Cardioid Tube Condenser Microphone ($2990)
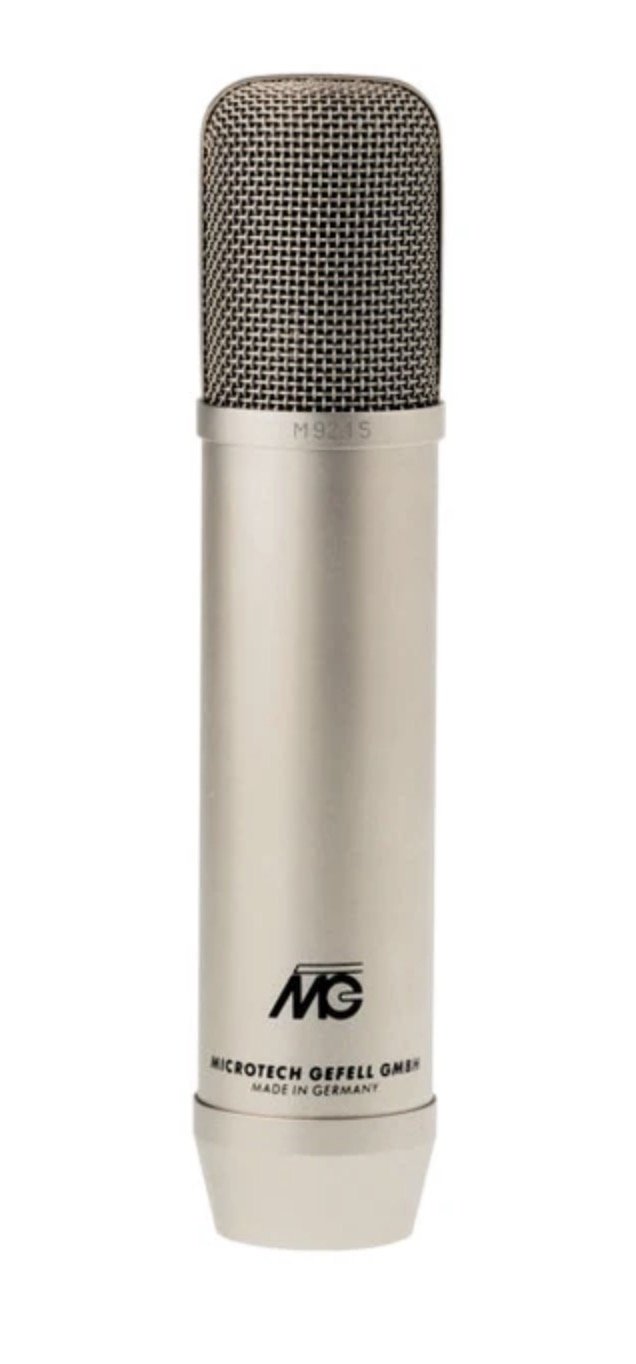
Gefell M 92.1 Cardioid Tube Condenser Microphone.
This is the big kahuna: a high-end, large diaphragm tube condenser mic made by one of the biggest names in German microphone engineering. This is a beautiful microphone for vocals, and it’s also a strong all-rounder that works with a wide variety of vocal styles. But, you’ll want to be sure to use it in a very quiet, acoustically controlled space: attempting to use this level of microphone in an acoustically uncontrolled and noisy bedroom will result in noisy recordings. And, to get the most out of these types of microphones you really need to build experience by using them hands-on with a wide variety of sources, ideally inside a professional studio environment.
So, depending on your experience level, this might be a piece of gear to work up to, rather than buying as one of your very first items. If you’re still working out of your noisy bedroom, I’d wait to spend this kind of money on a microphone until you have a more professional space to work within.
When it comes to vocal mics, always remember: you can find amazing mics for vocals at all different price points, from $99 up to many thousands of dollars. Price is never the primary indicator of a vocal mic’s quality, or what will work best in your individual situation. That’s why I’ve included both a budget and a high-end vocal microphone option here, to give you a sense of what high quality sounds like at both the top and the bottom of the market.
Radial ProAV1 1-channel Passive A/V Direct Box ($149)
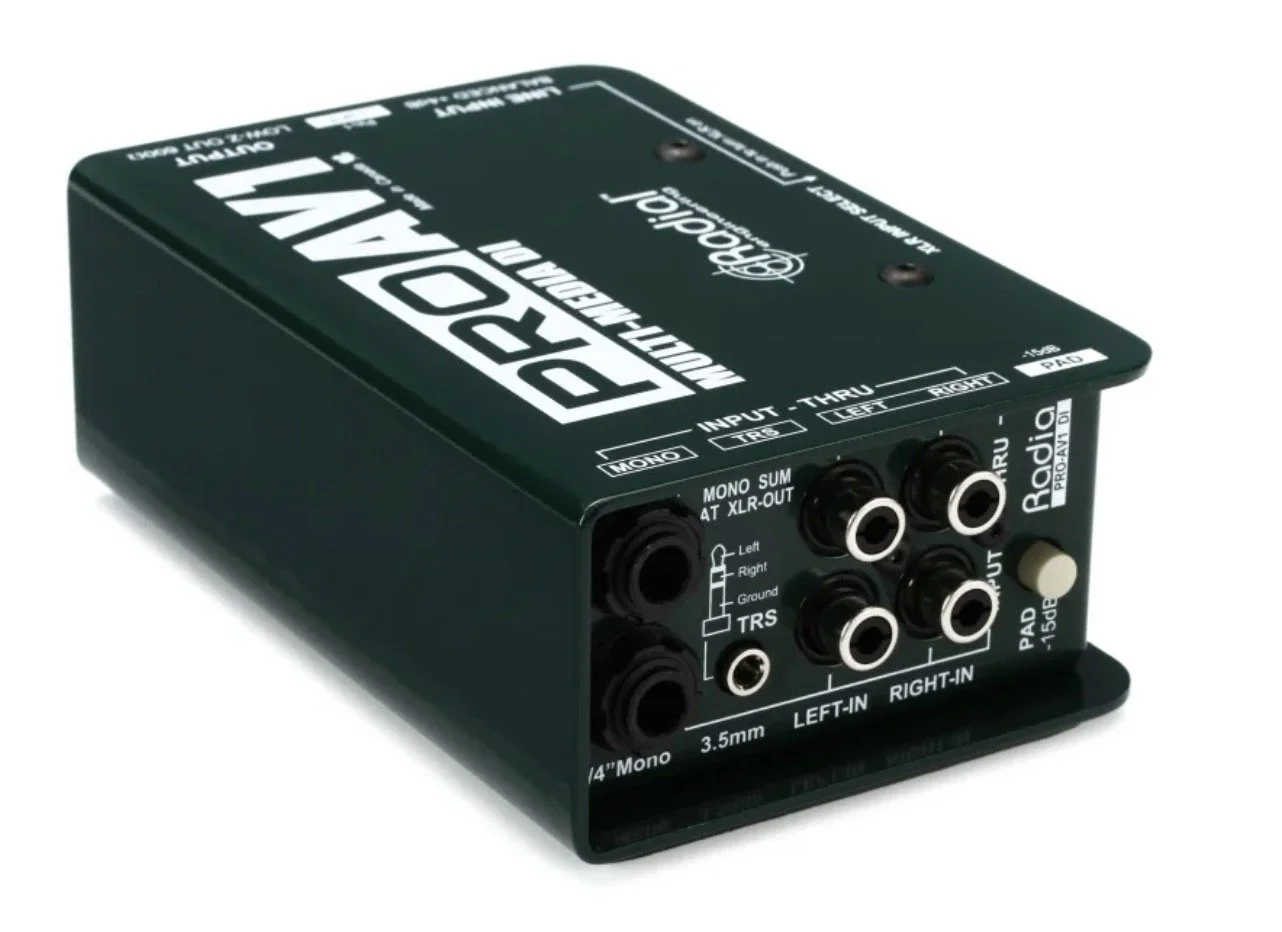
Radial ProAV1 1-channel Passive A/V Direct Box.
DI boxes are very useful pieces of gear in the studio: they allow you to input sound from a wide variety of different sources by converting signals from instrument level to line-level, before the signal hits your audio interface. They work great for synthesizers, cassette tape machines, and bass guitar. This particular DI box is a true Swiss Army knife; it’s got a wide range of various inputs and options that will allow you to DI just about any type of instrument, pedal, keyboard, or consumer-type stereo or tape machine you can think of.
Radial ProD2 2-channel Passive Instrument Direct Box ($199)

Radial ProD2 2-channel Passive Instrument Direct Box.
This is a second, more simply laid out 2-channel DI box. It would work great for everyday stereo instrument DI duties, like certain types of synths with stereo outputs. Or, you could use each channel individually and DI both a guitar and a bass instrument at the same time, with a single piece of gear.
Sennheiser e835 ($99)

Sennheiser e835 dynamic vocal microphone.
I’ve included this as a general purpose vocal mic that could be used for recording scratch vocals live with the band. Afterwards, you’d then overdub those same vocal parts using your nice microphones in a dedicated vocal session.
It would also work great as your talkback microphone, plugged into the PreSonus headphone distribution station for talking with the band while they’re in their headphones during recording.
Cabling
Cables are disposable items in the studio, so spending a little more can get you a longer-lasting, more durable cable (up to a point). We don’t want low-quality, buzzing cables ruining our recordings, but we also don’t want to overspend on a disposable item that will need replacement regularly.
For the behind-the-desk applications, it makes sense to go more fully professional: these cables will spend most of their lives left plugged in and subject to much less wear-and-tear, so going with the high-end Mogami option gets us excellent reliability and less time spent hunting around for cable shorts behind the desk.
Pro Co EVLMCN-25 Evolution Microphone Cable - 25 foot x18 ($898)

Pro Co EVLMCN-25 mic cable.
A solid mid-level cable choice, these will hold up to daily use while not being prohibitively expensive when it comes time for replacement. I’ve chosen the 25 foot version as a basic general purpose option, one for each of the 16 recording channels plus two spares. Don’t just go out and buy these exact cables! Measure your space first, and make sure you’re buying cables that are long enough; adding an extra 2-5 feet on your cable measurement length is usually a safe bet.
Mogami Gold DB25-XLRF 8-channel Analog Interface Cable - 5' ($269)
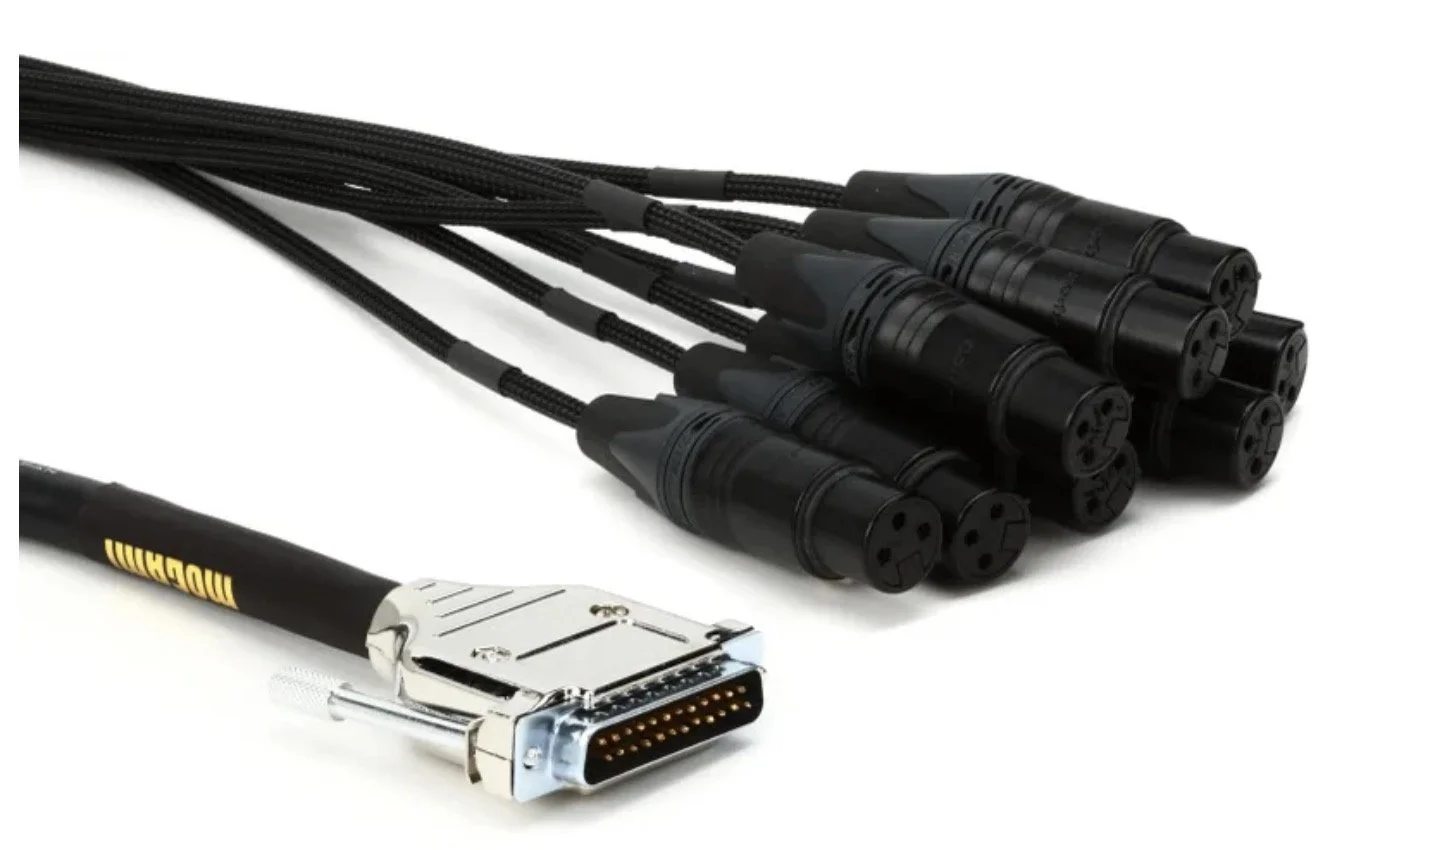
Mogami Gold DB25-XLRF 8-channel Analog Interface Cable.
This interface cable connects to the DB25 port on the back of the Universal Audio interface, and unlocks the additional 8 available recording channels that aren’t served by the 8 built-in preamps. For this setup, you’d connect these cables to the outputs of your outboard mic preamps, then plug your mic cables directly into your preamp inputs.
Mogami Gold DB25-XLRM 8-channel Analog Interface Cable - 5' ($249)
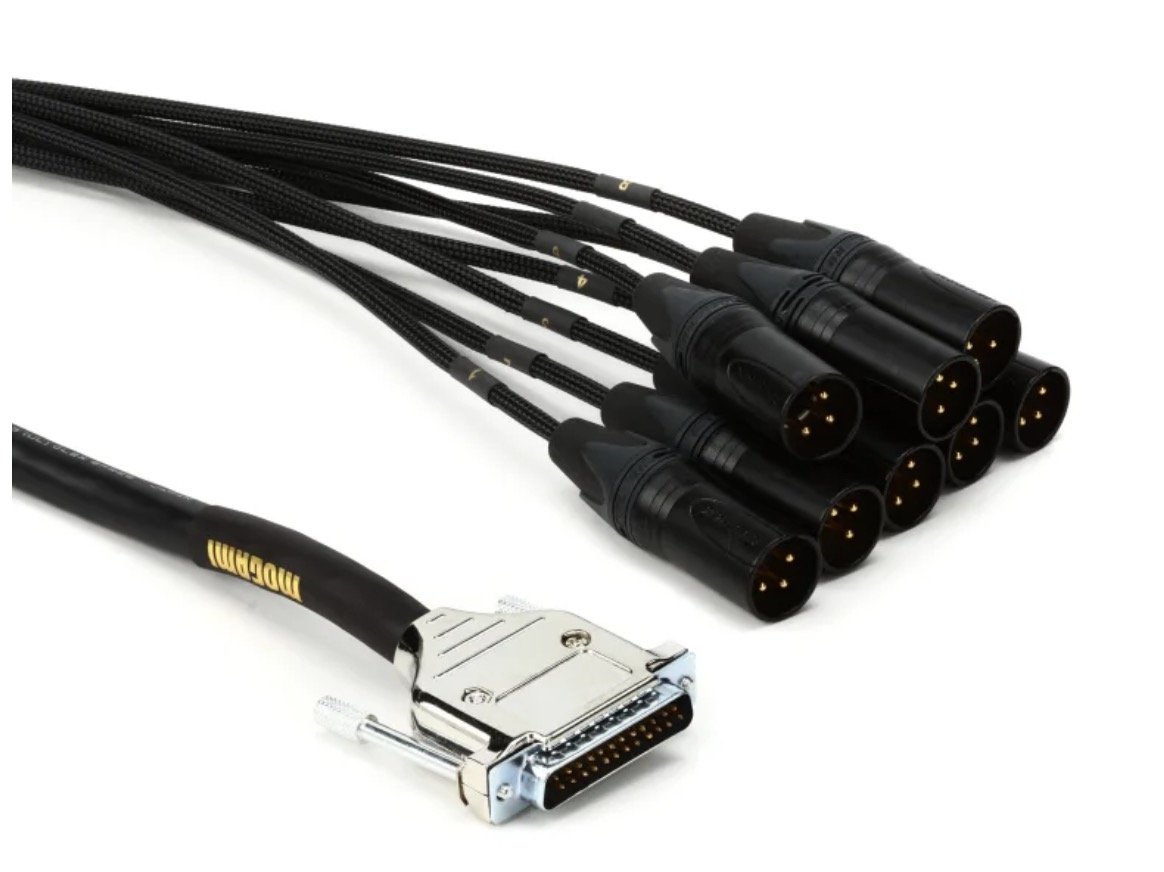
Mogami Gold DB25-XLRM 8-channel Analog Interface Cable.
This DB25 cable connects to the 8 line output channels on the back of your interface. For this build, you’d connect 2-4 of these outputs to your PreSonus headphone distribution station using XLR female to TRS male adapters (not included here, but cheap and easy to find). Then, send up to two different headphone monitoring mixes out to the band using those outputs.
Once you’ve done this, you’ll still have an additional 4-6 line outputs to play with, perhaps interfacing them with a patchbay as you expand your studio setup.
Mogami Gold TRSXLRM-15 Balanced 1/4-inch TRS Male to XLR Male Patch Cable - 15 foot x2 ($160)

Mogami Gold TRSXLRM-15 patch cable.
For our behind-the-desk cabling connecting our studio monitors to our interface, I’ve chosen the top-of-the-line Mogami cable. These cables will last years in a low-traffic environment, and minimize needing to go behind the desk to cable manage and search for shorts while we’re using them. These cables connect your audio interface outputs to your ADAM speaker inputs.
Roland RHC-25-1414 Headphone Extension Cable - 1/4-inch TRS Female to 1/4-inch TRS Male - 25 foot x5 ($160)
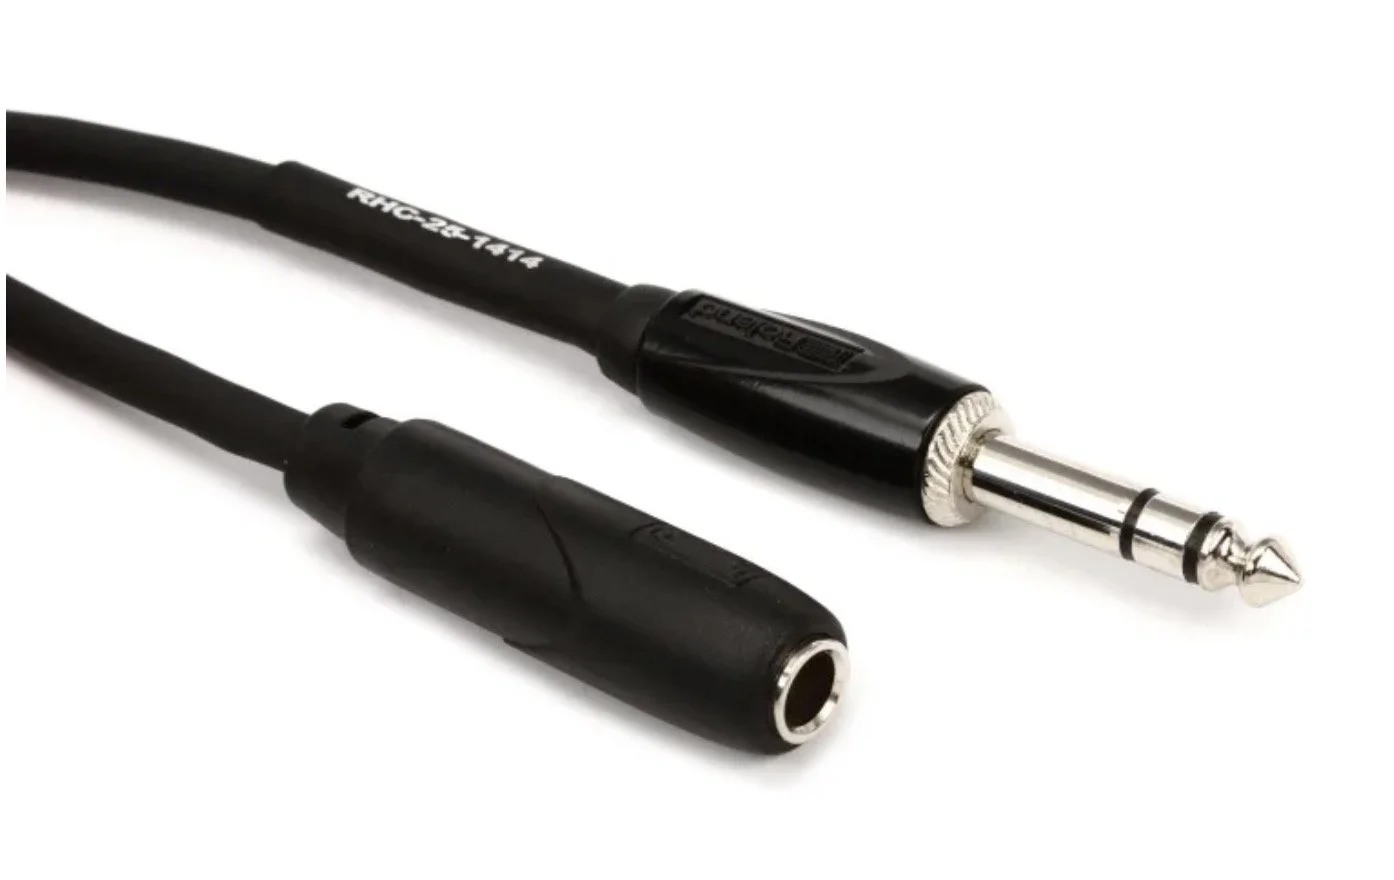
Roland RHC-25-1414 Headphone Extension Cable.
These headphone extender cables allow you to send headphone monitoring from your PreSonus headphone distribution station out to the recording area. I’ve included five of them, one for each band member. Make sure you measure your space, and buy longer versions of these if needed.
Microphone stands and clips
Ultimate Support MC-125 Studio Series Microphone Boom Stand x2 ($598)

Ultimate Support MC-125 Studio Series Microphone Boom Stand.
Since we’re spending big money on expensive studio ribbon mics, we need nice beefy counterweighted stands to support them. This is one of the most adjustable boom stands on the market; the counterweight is adjustable for optimum balance, the base weighs a full 35 pounds for a highly sturdy low center-of-gravity, and the rolling casters lock in all directions. This is a great stand choice for precise adjustment of your drum overheads, and gives you a super sturdy base once you’ve found the perfect position. I’ve included two of them, one for each overhead mic.
A nice beefy stand like this would also be my choice for setting up a vocal recording station, especially when using a very high-end large diaphragm condenser like the Gefell.
Lauten Audio Rim Mount ($99)

Lauten Audio Rim Mount.
This is a specialty clip for mounting the Lauten audio snare mic to the snare drum body. It’s got strong vibration decoupling, offering some of the benefits of a freestanding microphone setup along with the convenience of a rim mount.
K&M 210/9 Telescoping Boom Microphone Stand x5 ($510)
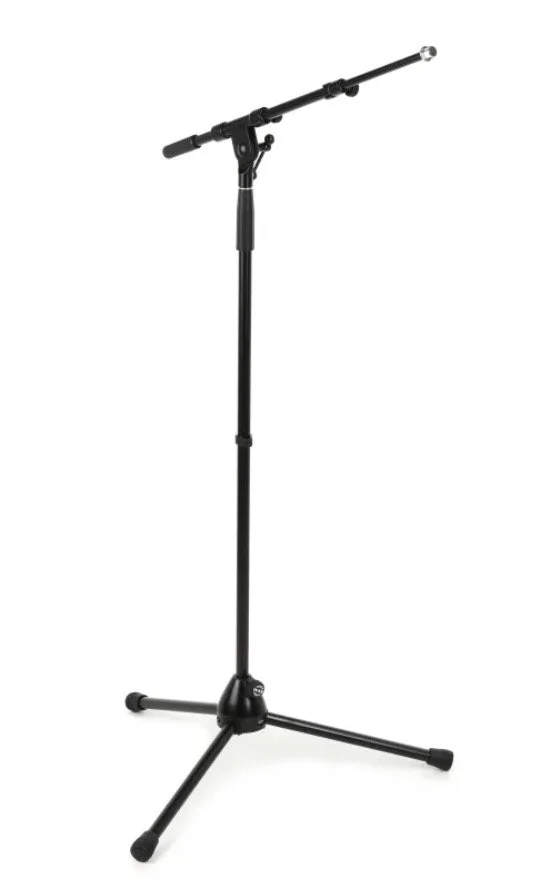
K&M 210/9 Telescoping Boom Microphone Stand.
A pro studio classic boom stand option, this is a great general-purpose boom stand that will hold up to years of daily use. I’ve included five of them, and this number is meant to get you started; it’ll be enough for a full band recording setup including your clip-on drum mics. Over time, you’ll find you want at least as many mic stands as you have recording channels on hand at all times.
K&M 25950 Extra Low Profile Tripod Base Boom Mic Stand x5 ($510)
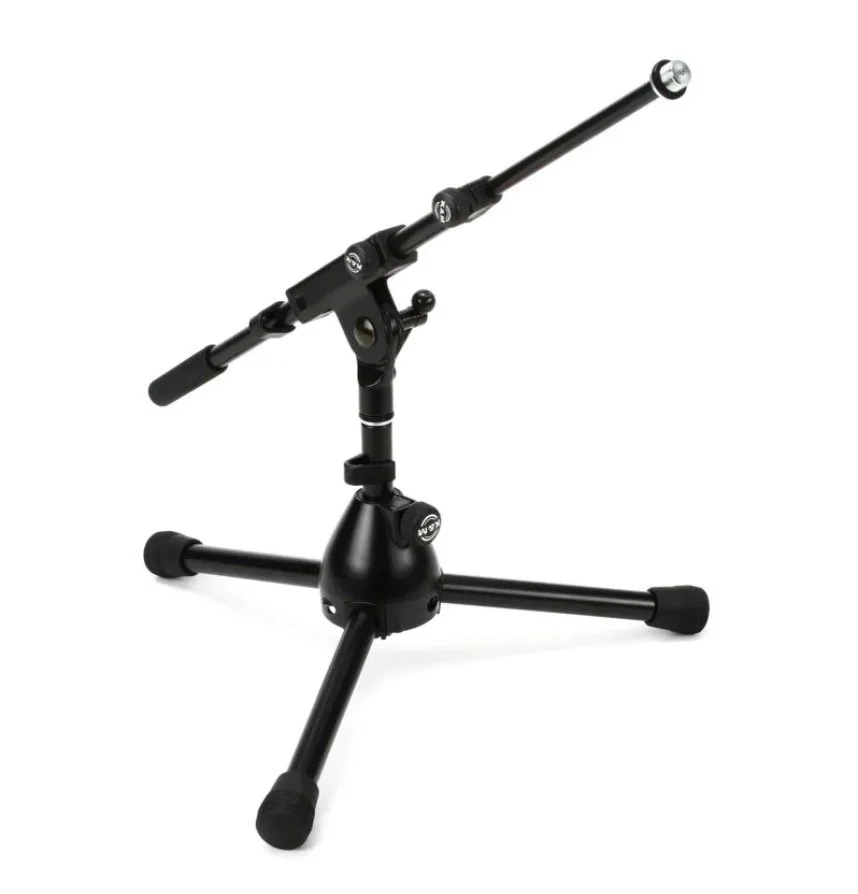
K&M 25950 Extra Low Profile Boom Mic Stand.
These shortie stands are extremely convenient: they’re great for micing guitar and bass cabs, drum kits, seated performers, and more. I’ve included five of them as a starting point; you’ll likely find grabbing an extra few of these over time a wise investment.
Outboard gear racks
Gator G-PRO-8U-19 Pro Series Rack Case ($269)
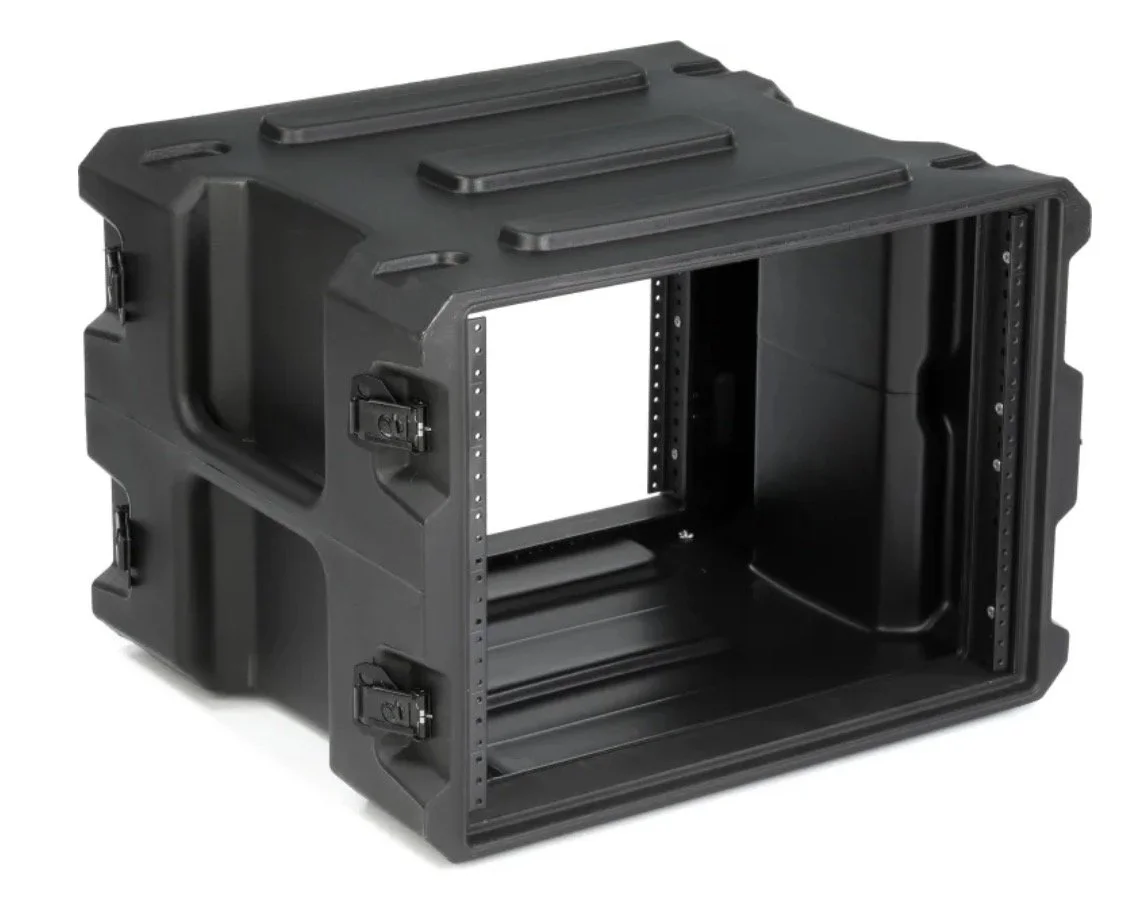
Gator G-PRO-8U-19 Pro Series Rack Case.
This is an 8U heavy duty portable rack, with enough space to house all of the outboard gear listed in this build, plus some additional blank spaces for allowing proper air circulation around any gear that generates a lot of heat (like your audio interface). Always make sure you pay for extra empty space inside of your racks to allow for sufficient airflow and ventilation: too much heat building up in the rack can lower the working life of your expensive electronics significantly!
A little more money spent up front on a slightly bigger rack and some vented 1U rack panels is small pennies, compared to replacing or repairing a burned-out piece of expensive studio outboard gear. The very highest-end pro studios often use actively cooled, temperature controlled racks that have dedicated fans or air conditioning piped in, for this very reason.
For the rest of us, a good rule-of-thumb when it comes to ventilation in your studio racks is to plan for 1U of empty vented space both above and below any gear that generates a noticeable amount of heat. This will allow air to naturally circulate within the rack, and prevent any dangerous overheating of your equipment.
Speaker stands
Behringer SM5002 Heavy-Duty Height-Adjustable Monitor Stand Set ($69)

Behringer SM5002 Heavy-Duty Height-Adjustable Monitor Stand
These are high-quality if basic speaker stands, sized to fit both the ADAM audio monitors listed above and the Primeacoustic speaker pads listed below.
Acoustic treatment: first reflection points
GIK Acoustics 244 Bass Trap with FlexRange Technology x3 ($315)

GIK Acoustics 244 Bass Trap
In acoustics, first reflection points are the areas on the walls and ceiling where sound waves make their first reflections after leaving your speakers. For the most accurate sound at the mix position, it’s important to absorb these reflections with acoustic treatment. This is usually done by placing acoustic panels on the walls and ceiling surrounding your speakers.
Often, the panels used are slightly thinner than what I’ve chosen here; using a panel under 4’’ thick would be typical.
However, because an uncontrolled and muddy low end is most often the biggest acoustic issue in small control rooms (like what you’d find in a home setting), going thicker makes these panels a 2-for-1. These panels will work great at controlling your first reflections, but because they’re also a full 5.25’’ thick, their acoustics profile extends farther down into the low end, helping reduce muddiness at the same time.
You’ll want three of these, one to be used as a ceiling cloud placed above your mix position, and one each for the left and right walls surrounding it.
There may be some additional costs to consider in terms of the mounting hardware to install these panels, but because that will be specific to your individual space, I haven’t included any anchoring or mounting systems here.
You may also find that it makes sense to add some additional acoustic treatment into your recording area, either by using movable acoustic baffles, or mounting panels and bass traps. Make sure you perform an acoustics analysis to see what you really need, as you develop your space.
Acoustic treatment: bass traps
GIK Acoustics Tri-Trap Corner Bass Trap x4 ($1100)

GIK Acoustics Tri-Trap Corner Bass Trap
Bass traps are a specific type of acoustic control tool that’s designed to “trap” low-end bass frequencies, providing a more clear and transparent acoustic space to work within. They’re essential equipment: it will be impossible to achieve good translation across playback systems without them, in most cases. A lack of sufficient bass trapping is the leading cause of that mix you spent hours working on suddenly sounding unrecognizable when played back inside of your car.
Ideally, these corner traps should be placed floor to ceiling in each corner of your room. For these units, you’ll need two for each room corner, stacked on top of each other. For this budget, I’ve included 4 of them, to placed in the corners of the room closest to your mix position.
This level of bass trapping is meant to get you started. You will likely want to add additional bass trapping for the other room corners by purchasing an additional 4 traps, for a total of 8. But, again, check to see what’s needed in your individual space by doing an acoustics analysis first, as doubling your bass trapping is a significant additional cost to incur.
Acoustic treatment: speaker pads
Primacoustic RX7 Monitor Isolation Pad 10.5 x 13 inch x2 ($284)

Primacoustic RX7 Monitor Isolation Pad.
Speaker pads placed underneath your studio monitors prevent acoustic resonances between the vibrating speaker, and whatever they’re placed on top of. This helps your speakers sound their best, and they really do work well. For best results, though, stay away from the all-foam speaker pads, and make sure anything you buy includes a heavy metal plate.
Speaker pads require sufficient mass to prevent acoustic energy transfer between the speaker and the surface they’re placed on, so the all-foam speaker pads without thick metal aren’t as effective. These particular pads by Primeacoustic are sized to comfortably fit both the Behringer monitor stands and the ADAM TV7 monitors I’ve chosen elsewhere in this build.
Acoustic treatment: estimated shipping costs
If you’re buying your acoustic treatment from GIK Acoustics or another manufacturer, you’ll need to pay shipping costs from the factory to you. And, because these items are bulky, preassembled, and require significant packaging, shipping costs can be high. I’ve estimated this in my budget for this build, but expect these costs to vary, especially if you’re shipping internationally.
Acoustic treatment: DIY options
Another option to potentially save money is to build your acoustic panels and bass traps yourself. But, be careful! Make sure you’ve read the correct textbook-based source material on how to do this the right way. If you don’t, you could design, build, and install a bunch of custom treatment that doesn’t end up actually doing anything at all, from an acoustics control perspective. The items I’ve recommended here have all been professionally tested and certified by licensed acousticians, so you can be confident they’re actually doing what they say they will.
Additional options to save money
Buildout complete! We’ve built a fully featured, very high-level professional 16-channel recording setup for recording full bands live in the studio. Here’s some tweaks you could consider making to save money on this build; some of them may be applicable in your individual situation.
If you were to apply all of these different money-saving options, plus get lucky in finding some good quality gear on the used market, you could potentially drop the total cost of this buildout by over $8,000!
Buying used gear
Remember that all of the prices quoted here are for new gear, and are current at time of writing. But, you don’t need to buy new, certainly not for every single piece of gear.
When looking around for used gear, I wouldn’t skimp on mic cables or your audio interface choice. Remember, every signal you record touches your mic cables and your interface, so buzzy shorting cables and low-quality digital to analog conversion can lead to outsized negative results in your recorded work day-to-day.
Downgrading ribbon microphones and preamps
For this build, I’ve made some choices that really go for the extra deluxe, super high-quality options over caring too much about price. Particularly when it comes to my choice of the high-end Coles 4038 ribbon microphones, their associated specialty preamps, and their heavy-duty mic stands. Don’t get me wrong, these are beautiful mics that get you beautiful results on a drum kit when used as overheads, and they’re also multipurpose mics that will sound great on a variety of other instruments. Give the Coles a try on a nice acoustic guitar or grand piano, and be prepared to smile ear-to-ear.
But, this level of high-end ribbon microphone might not be strictly necessary in all situations, especially if you’re just starting out in the business. It also depends on the type of music you record most often: a string quartet or acoustic instrument will often benefit from a ribbon mic setup, but if you primarily record amplified DIY punk or grunge bands, this level of gear might be overkill for those particular styles, when you’re just starting out.
So, you could swap out those Coles for slightly lesser quality condenser mic options for use as your drum overheads, maybe try using lighter-duty boom stands along with a sandbag for stability, and ditch the specialized AEA ribbon preamps for a cheaper option. By doing this, you could drop your total budget for this build by at least another $2,500.
Buying cheaper mic stands
Brand new K&M mic stands are a great long-term investment, but they’re also the high-end and more expensive option. Going with cheaper used stands off of Craigslist or other used marketplace could drop your total mic stand costs by around $500. Be aware that cheap, sagging mic stands can be a real pain when it comes to your daily life recording in the studio.
I would not skimp on the expensive pro-quality counterweighted stands if you buy the high-end Coles ribbons, or my upgraded Gefell vocal microphone option. You don’t want your expensive mics to get ruined by a cheap stand tipping over in the middle of a recording session.
Choosing the budget vocal microphone option
The Gefell tube condenser mic I’ve chosen as the premium vocal mic option is a beautiful microphone, and a good all-rounder for working with a wide variety of vocalists at very top-of-the-line professional quality.
But, it’s also quite expensive, and you might not need to start out with this level of microphone right away, especially if you’re new to recording and don’t know how to properly set up and use a high-end mic like this. You can find high-quality microphones at all price points, and price is never the primary indicator of quality when it comes to vocal mics.
That’s why I’ve also included the Audio Technica AT 2020 as a budget vocal mic option: even though it’s only $99, its held its own right next to multi-thousand dollar tube condensers like the Gefell in pro studio vocal mic shootouts. It’s a strong, general-purpose budget condenser that might be a good place to start out with vocal microphones.
If you pick the lower budget option for just this one microphone, you drop the total cost of this build by over $2,800!
Recording studio return-on-investment
This budget level is obviously quite a lot of money to spend on a recording setup, and if you’re going to spend this kind of money, you’ll want to be sure you’ve got a plan for paying these costs back. That probably means doing paid recording jobs for other people.
Let’s run some simple, slightly arbitrary numbers on the potential return-on-investment for this type of a recording setup. The exact numbers will always vary based on where you live, and your individual goals as a musician or engineer. But, this exercise will help us learn the right questions to ask when considering recording studio business models, their return-on-investment, and if it’s wise to spend this kind of money.
Band recordings as a service
If you were to offer professional band recording services at a rate of $500 per day (a very reasonable rate for recording services at time of writing; in many larger metropolitan areas the day rates for studios are significantly higher), it would take you around 49 days of paid recording work to pay for this gear setup.
Let’s think of this in terms of recording weeks. For a typical rock band recording a full-length album, a week of paid studio time isn’t an unreasonable amount of time to consider booking to record and mix the album, provided everyone comes into the sessions very well-rehearsed and ready to work.
That means your average project value for a week-long job sits at around $3,500. That’s a very fair rate, considering working at many of the top-end name brand studios in Los Angeles and New York City can end up costing many tens of thousands of dollars, just to finish the recording of your album (no mixing included).
Working with a $3,500 average weekly project rate, you’d need about 7 of these types of jobs to break even on the gear costs needed to start your business. So, if you can stay booked out for entire recording weeks for a seven week period, your gear is paid for, and then you’re into making profit from there.
How are you going to stay booked?
This is a fairly low-risk payoff period for buying this level of gear, if you can keep your studio booked regularly. That’s the real question to ask here: how, exactly, are you going to keep your studio booked out regularly?
Here’s some questions to help clarify this further:
Where are the customers for your business going to come from? Word of mouth and social media posting should not be your only answers to this question.
Do you know at least 7 different bands who might want to pay you their hard-earned money to do a full album recording for a week-long period? This is about the number of bands you’ll need to record in order to break even on your studio setup costs.
Do these 7 band friends of yours actually have sufficient funds to pay your rates? $3,500 for a week of recording, while a reasonable fair market rate, is still a lot of money for most people. These would need to be serious bands that take their music seriously.
How are you going to convince those 7 bands to spend their money with you, instead of recording at a different studio they might have worked at before? You might be able to do this by dropping your prices, but keep in mind if you do that it can increase your payoff period substantially. And, it’s never nice to deliberately undercut other studios in your area; that can negatively affect your reputation and result in nonviable business long term. Blue plate special, bargain basement pricing should never be the only reason someone might want to record inside of your studio. Think about other market differentiators that make your particular studio unique.
How many of the 7 bands that you need to break even are ready to record right now?
How many might be ready to record over the next 12 months?
How will you pay the rent on your space if those 7 jobs that you need don’t come in over the next 12 months?
Once you’ve recorded your friend’s albums, where are you going to find new customers to work with? Again, word of mouth or posting on social media should not be your only answers to this question.
Once you can start to answer these types of questions, you’ll be in a place to decide whether it’s worth it for you to spend this kind of money on recording gear.
Other recording studio business models and ideas
Purchasing this level of gear gives you a lot of options for making money in the pro audio world. Here’s some ideas to think about that go beyond the traditional recording studio business model of recording bands for a fee.
Concert events held in-studio
You’ve got all the gear to pull off a great-sounding live recording, so why not do an intimate live concert event in the studio with one of your favorite clients? This is a win-win; the band gets an intimate show they can charge a little bit more for their most diehard fans to come see, and a really high-quality recording of their live set done by you. You get some creative and collaborative marketing for your studio.
Album release listening parties
When an album comes out, instead of having a listening party in someone’s living room, why not at your studio? Set up some nice speakers, put out some snacks, and maybe include a short live performance by the artist. If the album being released was recorded at your studio, all the better! This is another win-win; the artist gets to show off their new work to their biggest fans in an intimate setting, and you get a bunch of creatives checking out your space in-person and sampling your audio work.
Group recording workshops
A lot of people would like to know about the basics of audio recording; either how to get some good-sounding basic tracks recorded on their own using affordable gear, or how to set up their live sound properly for their own band’s performances. You could offer a series of short workshops on these topics, taught live inside of your studio, perhaps a few times a year. Not only would you get paid for the workshops, you’re showing your professional expertise directly to potential clients in an educational setting.
Lessons, workshops, and rentals
You could teach one-on-one lessons or group coaching packages inside of your studio, with topics ranging from mixing, to using outboard gear, to recording techniques for various types of instruments.
You could also rent your space out to instrumental instructors for teaching their own private instrument lessons; it’s always valuable to learn how to play an instrument inside of a nice-sounding acoustic space, and both the instructor and the student are likely to think of you first when it comes time to record an album.
Video work and music videos
Film shoots sometimes require a shot of a recording studio interior: why not rent your space out for the shoot? Shooting your existing space will be much cheaper for the filmmaker than building a set that looks like a recording studio, and the nice thing about many film projects is they usually have a decent budget to work with for locations.
What about using your studio space to shoot a music video or live performance within? Check out the “From the Basement” video series by Nigel Godrich for some interesting ideas on how to film live musical performances inside a recording studio.
Recorded interviews
As podcasting and especially video podcasting become more popular, why not use your space to record and shoot interviews?
The shared space model
Here’s another potential business model: splitting your initial overhead costs among multiple engineers, and operating your facility as a shared space. So, maybe you partner with 2-3 other engineers you enjoy working with to build out a proper recording space, then each of you bring your own projects into that shared facility.
If you go this route, make sure you have an agreement in place up front on who owns what gear, and what happens when a partner decides to leave the business. Do the other partners need to buy them out, to compensate them for their initial investments in the shared space? These can be difficult conversations to have. But, it’s better to have them right at the beginning than a few years in, after everyone’s already spent a bunch of money and time trying to build something together.
For my regularly updated list of recommended audio gear optimized for use at home, reference the Home Studio Gear Guide.