Quickly export stems in Logic Pro
Here’s how to quickly export audio stems of your project inside Apple’s Logic Pro software.
What are stems?
Stems are audio files that contain the time-aligned audio for every individual track in your project. When your stems are properly exported, you can drag those audio files into any Digital Audio Workstation software, and be confident all of your ideas will line up just as you recorded them.
Stems are useful for doing remixes of your work, they’re a safer backup solution to your project compared to relying on the project file, and they can be required for employing remote mixers or other production professionals.
In a digital music studio, any qualified mixing engineer you hire should be sending you individual stems of their work in their final delivery, not just the stereo file of your completed mix.
Exporting stems in Logic Pro
Logic makes it very easy to export your stems in just a few clicks.
First, go to File > Export, and select “All Tracks as Audio Files”
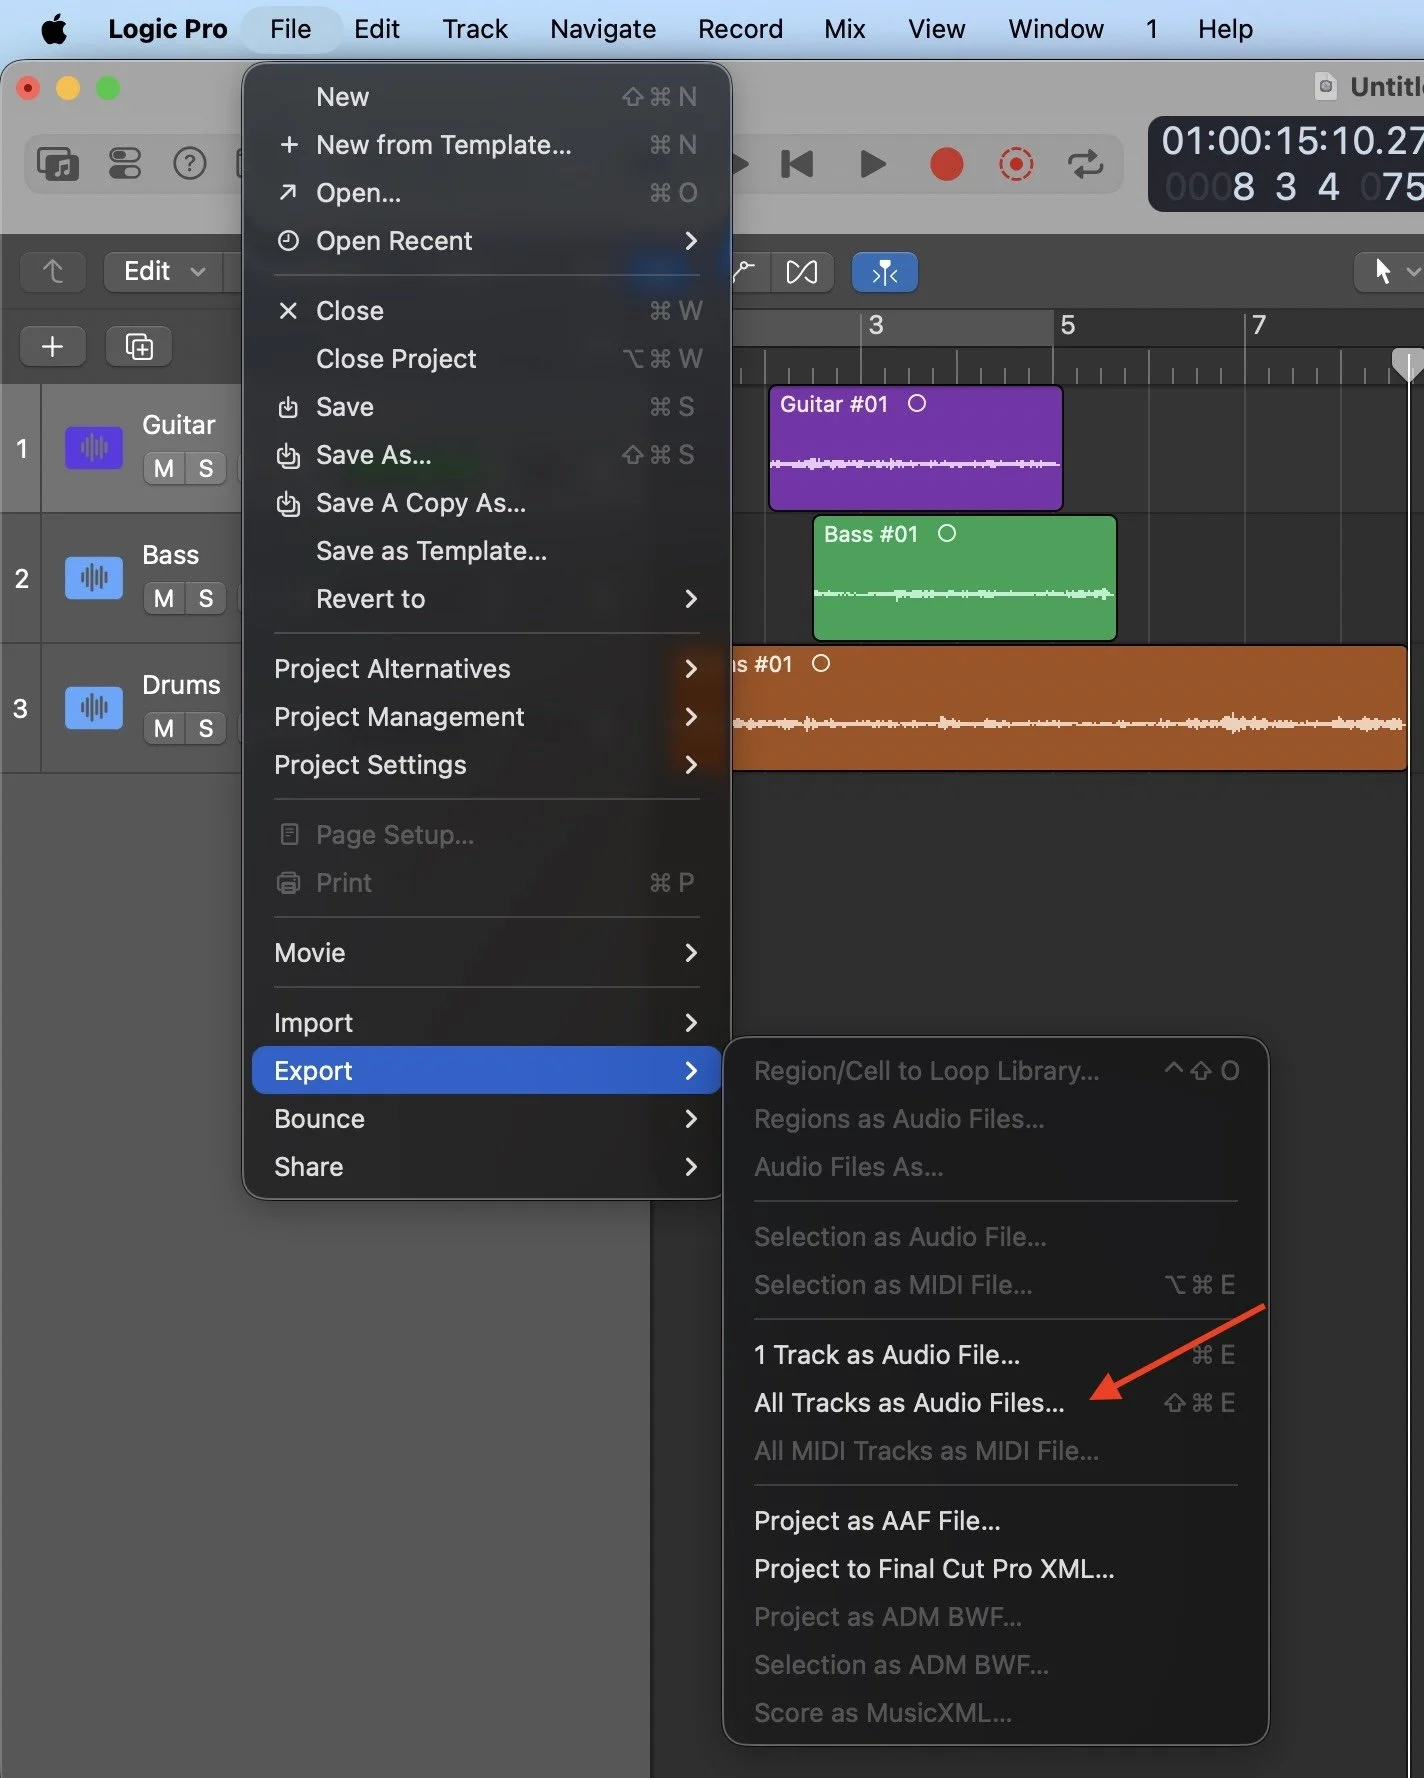
Then, select “Export”, and in two clicks all of your project audio will be exported as individual audio files to the location you’ve selected.
Digging deeper into exporting stems
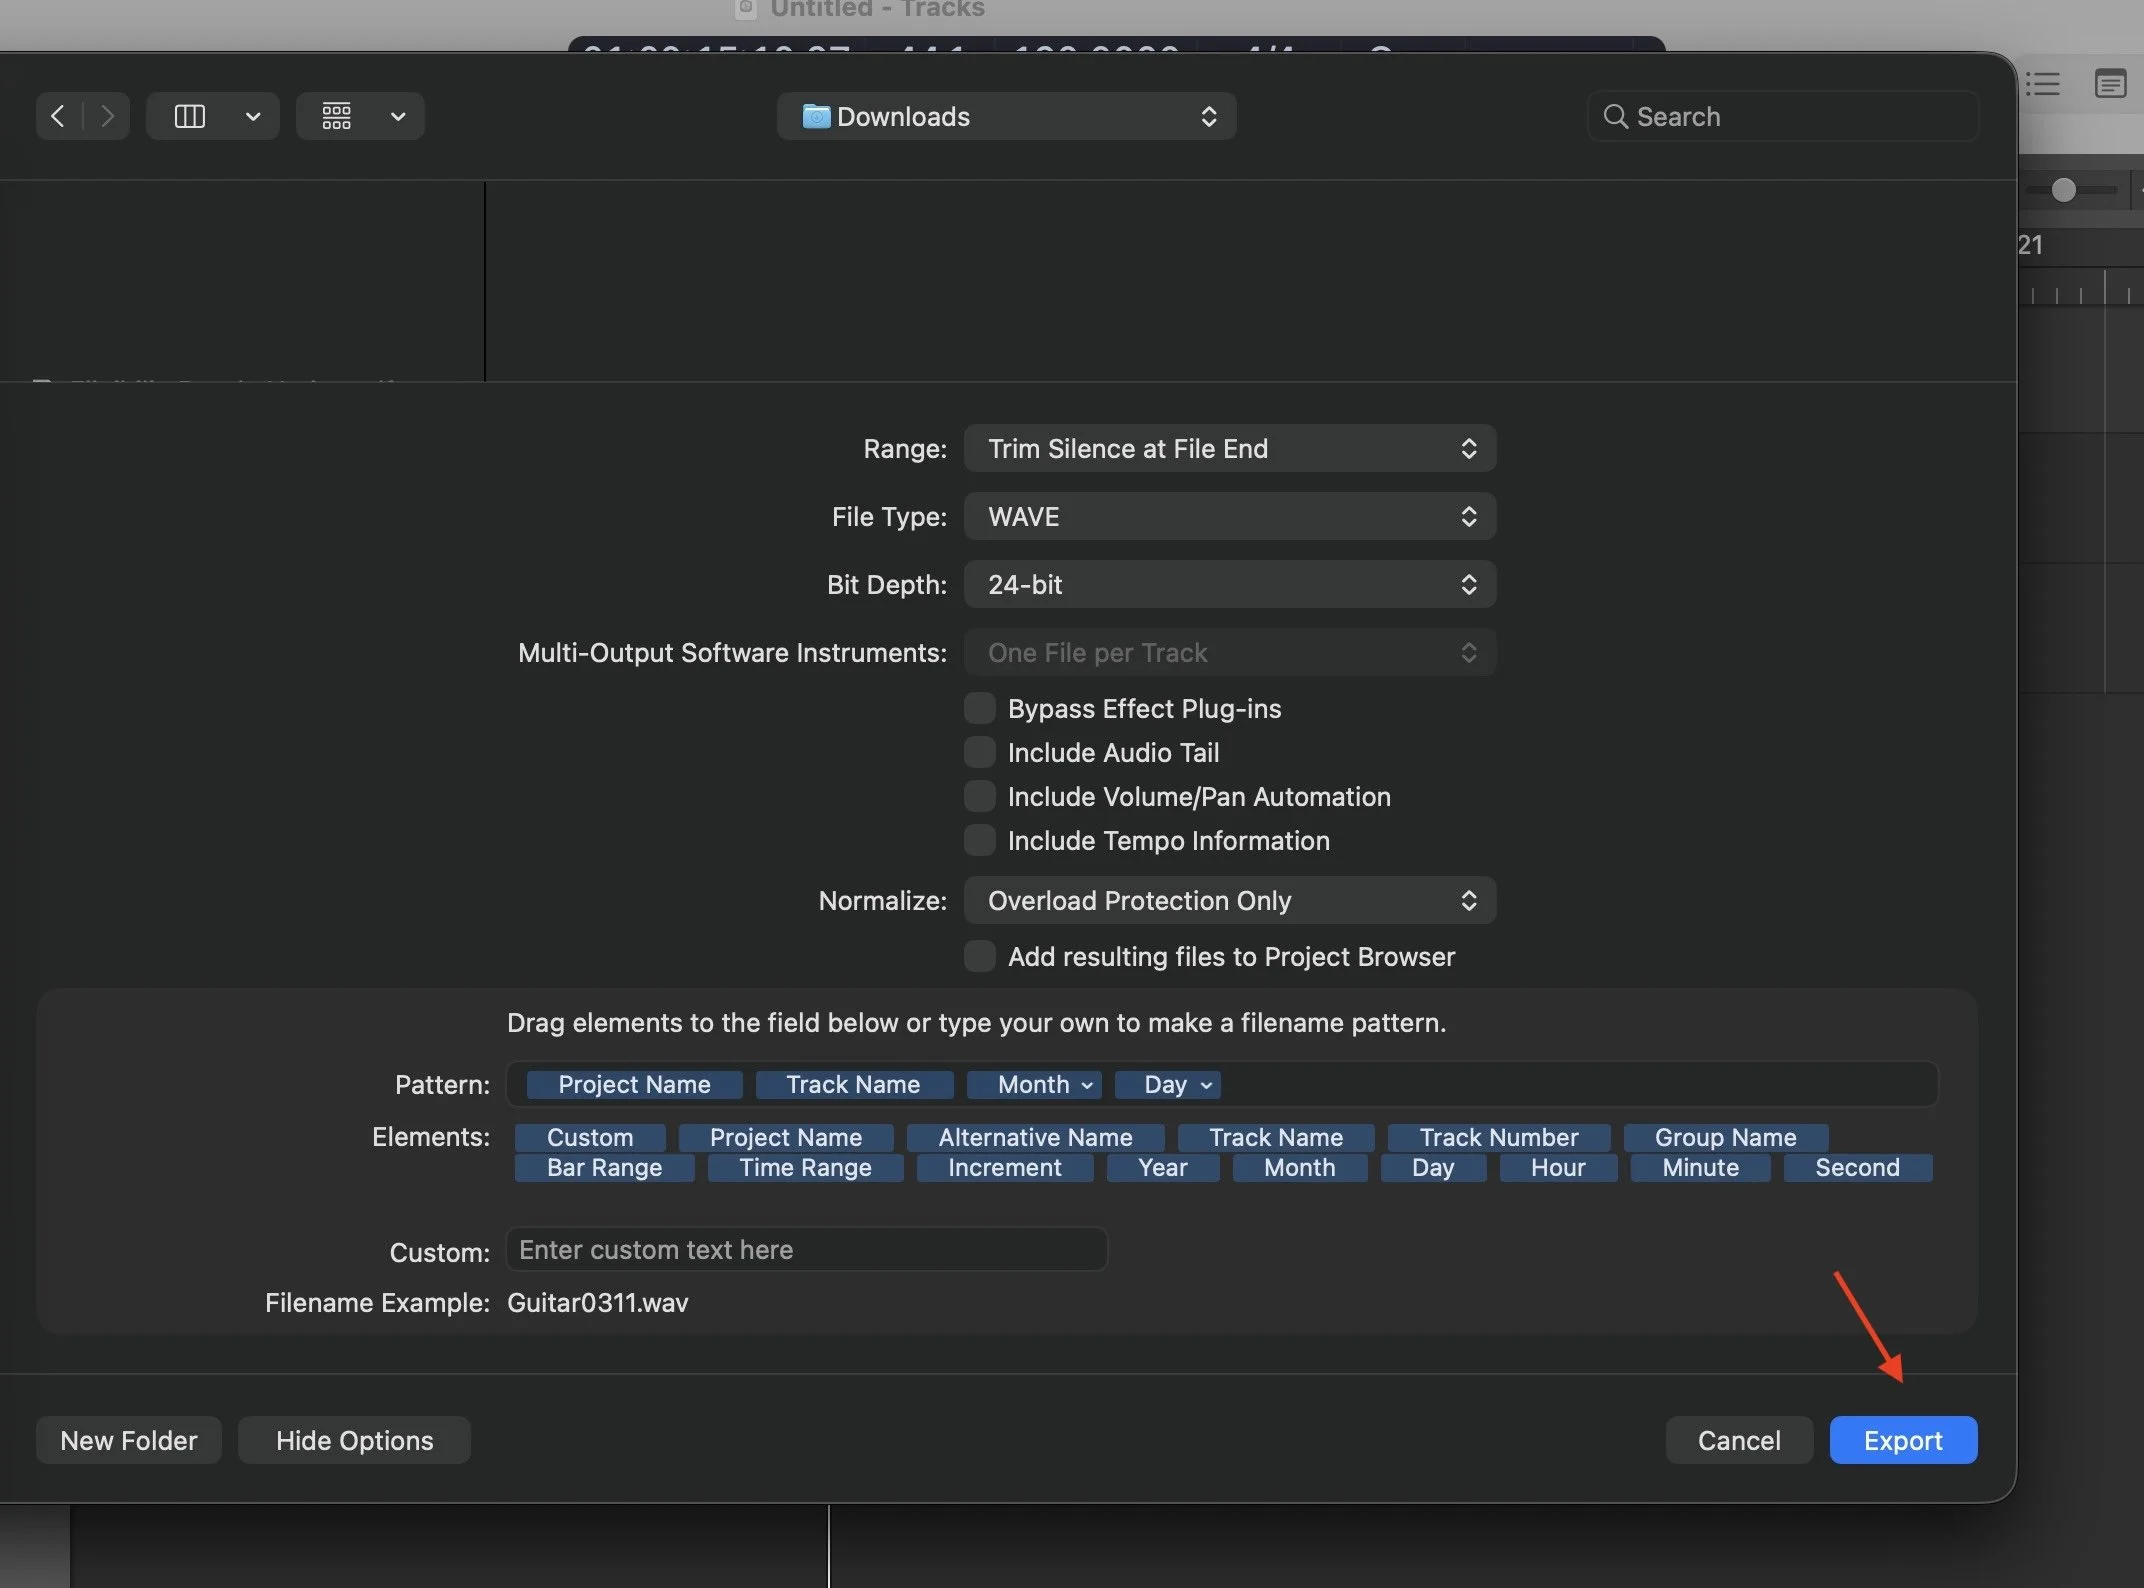
You’ll see a bunch of different options inside of the stem export screen, and which you choose depends upon several factors.
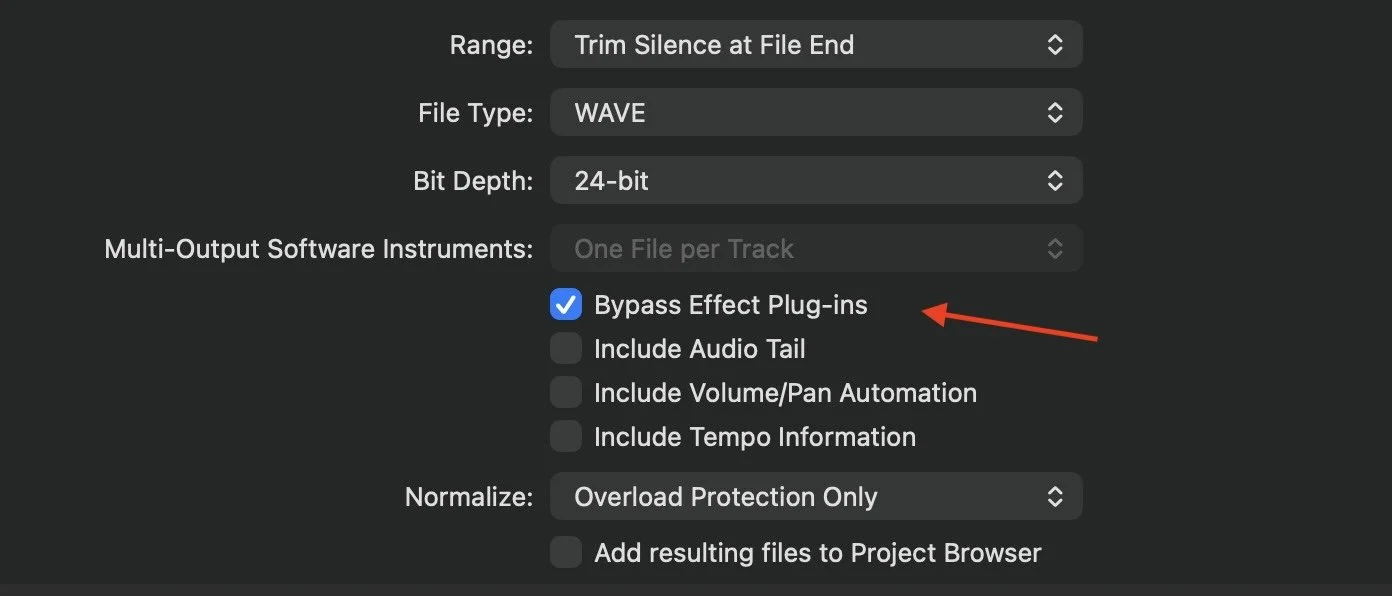
For “raw” stems, i.e. stems that contain only the raw audio and not any software effects you’ve applied, select “Bypass Effect Plugins”. Raw stems are usually required if someone else is mixing your work, as your mixer will probably want to generate their own versions of your chosen effects from scratch. That looks like this:
If you have specific requests as to the effects you’d like used on a given track, I’d just export a reference mix of the entire project that contains all of the software effects you’ve added, before stripping them out inside of your stems using the “Bypass Effect” checkbox. Then, make sure you send that reference mix to your mixer, to show them what you’d like to hear, along with the raw stems for them to work from.
Raw stems that don’t contain any effects, tempo, or panning information are often the most useful in a production setting, and that's why the boxes to add that information back into your stems are left unchecked by default. You always have the option to check the “Include Audio Tail”, “Include Volume/Pan Automation”, and other boxes if needed.
Including audio effects in your stems
If you choose to include software audio effects inside your stems, I usually like to also check the “Include Audio Tail” box. That looks like this:
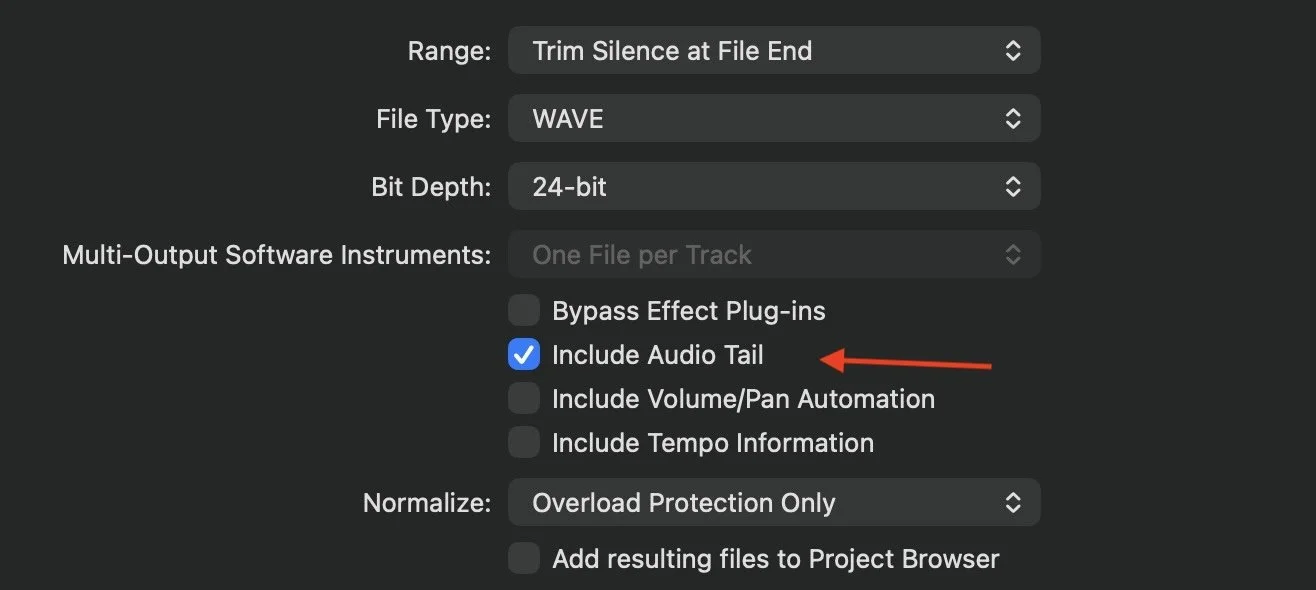
Checking these boxes as shown will include all software effects in your stems, and will retain the sounds of any audio effects that continue working after the audio has stopped. If you don’t check this box, software effects like reverbs and delays can get abruptly cut off inside your stems.
Including tempo information in your stems
If you’re getting more advanced in your production and are using the tempo features of Logic and a click track as you record, including that tempo information in your audio stems can be useful in certain situations.
For example, if you’ve recorded a track and are sending it out to a string producer to add an orchestra, including the tempo information will duplicate your click track settings and make it easier for the orchestra to play along with what you’ve already made during their own recording sessions. That looks like this:
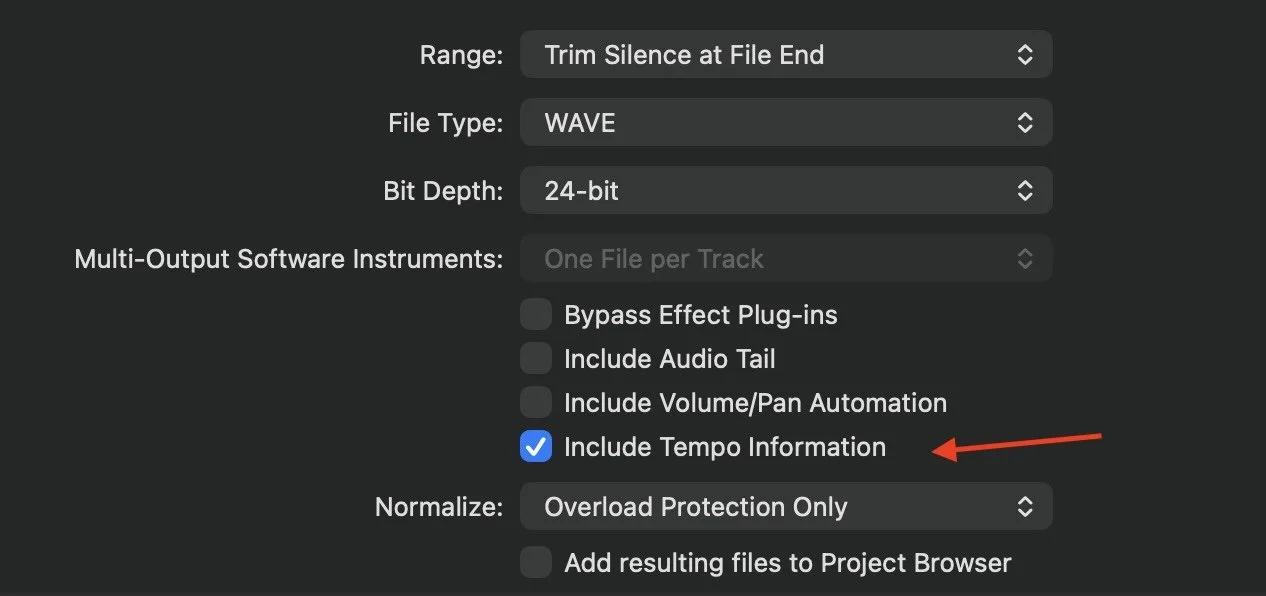
If you’re not using a click track during recording, there’s no need to check this box.